07) Exploring the Controls and Displays of ORANGE CLIP 3
Let’s take a closer look at key commands, controls and displays in Orange Clip 3, and how they impact your workflow.
Key Commands
Shift-Click the Solos to solo multiple bands

Shift-Drag the Multi-band post trims, Orange knobs, Dry / Wet blends and ceiling target circles to momentarily link all bands.

How Different Settings Shape the Sound
Control-Drag (Ctrl-Drag) the Multi-band ceiling target circles, Dry / Wet and Orange knobs to momentarily solo the band.


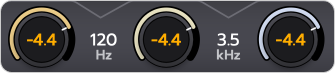
Command-Click (Ctrl-Click) the Orange knobs to bypass.
Quick Tip:
The key commands are straightforward:
Control-Click (Ctrl-Click) solos processor sections
Command-Click (Ctrl-Click) bypasses processors
Shift-Click links or unlinks parameters
These controls are consistent across Schwabe Digital plugins, so practicing them will help build muscle memory and speed up your workflow.
Input Trim
The trim fader, floating over the input meter, provides ±12dB of gain adjustment. Increasing the input trim pushes the signal level closer to the clip ceiling. The Input Trim changes are reflected on the input meter.
Output Trim
The Output Trim controls the plugin's output level after the true parallel mixer. If the output exceeds 0.0dBFS, the PEAK display turns orange and shows a positive value. Double-click the display to reset it.
Trim Link
Trim Link, located over the transfer function, helps maintain perceived loudness when adjusting the input or output trim. For example, increasing the Input Trim by 1dB automatically decreases the Output Trim by 1dB to maintain unity gain.
Trim Link Offset
While trims are linked, you can adjust their relative balance without unlinking them. Use Shift + Drag to modify the Trim Link offset between the input and output faders. For example, if both trims are set to 0dB and you Shift + Drag the input trim up by 1dB, the input meter will read 1dB louder than the output. To reset the offset to 0dB, use Shift + Option + Click on a fader (Shift + Alt + Click on Windows).
Meters and Clipping
The Input Meter displays the incoming signal level, including any input trim adjustments. The Output Meter shows the plugin's output signal after the mixer and output trim settings. Clipping is indicated when the signal exceeds the ceiling on the Input Meter.
Clip Value Display
When the input signal exceeds the clip ceiling, the CLIP value turns orange and shows the amount of clipping as a positive number. Clicking the numeric value once resets it.
Output Peak Display
If the output exceeds 0.0dBFS, the PEAK display turns orange and shows a positive value. To bring the output back below 0.0dBFS, adjust the Output Trim. Clicking the numeric display resets it.
Presets
Click the disk button to save a new preset
Click the Orange Star to set the default preset. *
*Pro Tools has a proprietary default preset system that overrides the "star" functionality in Orange Clip. If you are a Pro Tools user we recommend using their proprietary default preset system to avoid settings conflict.
AB
AB made simple. When you first open Orange Clip, both A and B states are active; they are both lit up. As you make changes to the settings, they are applied to both A and B. Only when you click A or B will they unlink so that you can make more detailed changes to one plug-in state. Option-click A to copy to B or Option-click B to copy to A. You can toggle between A and B by simply clicking A or B repeatedly.
Tag @SchwabeDigital in an Instagram story and show us how you are using Orange Clip—we’ll repost!
Be well,
Ryan Schwabe
Grammy-nominated and multi-platinum mixing & mastering engineer
Founder of Schwabe Digital