
EQing in Octaves: Part 1
This is the first of a three-part email series designed to simplify your approach to EQ and help you make better mixing decisions.
We measure sound frequencies on a logarithmic scale in Hertz (Hz), or cycles per second. While essential for describing audio, this unit can feel abstract and disconnected to how we think about and create music. For example, a frequency of 100 Hz means a sound wave vibrates or oscillates for one full cycle at 100 times per second.
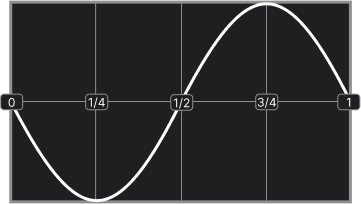
Musical notes are sound waves oscillating at specific cycles per second, and an octave is simply doubling or halving those oscillations to move up or down the scale.
Here’s where it gets tricky: there are only 12 notes in an octave, regardless of whether you're looking at 30–60 Hz or 3,000–6,000 Hz. This is because octaves follow a logarithmic scale—frequencies double with each octave (e.g., 20 Hz, 40 Hz, 80 Hz, 160 Hz, and so on)
This doubling can seem daunting, especially on an EQ graph, but understanding it can simplify how you approach EQing and balancing a mix.
Simplifying EQ: From Hertz to Octaves
The human ear picks up frequencies from 20 Hz to 20,000 Hz—a pretty wide range. But sound doesn’t stop at the limits of our hearing range. There are sound waves below what we can hear (infrasonic) and above it (ultrasonic). However, these low frequencies are usually filtered out by DC filters, and high frequencies by anti-aliasing filters, depending on the sample rate, of course.
Focusing on what we can hear, if we think in terms of musical octaves instead of raw numbers, that big range of 20 Hz to 20,000 Hz boils down to just under 10 octaves. That’s 10 manageable “bands” to work with, instead of 20,000 individual frequencies. Much easier to wrap your head around, right? Those 10 octaves can be broken down like this...

The 'middle' frequency of our hearing range, numerically speaking, is around 640 Hz—an unexpected midpoint, but it makes sense when we think in terms of octaves. There are about 5 octaves below 640 Hz (down to 20 Hz) and 5 above (up to 20 kHz), meaning our hearing is split evenly in terms of octaves.
Relating EQ to musical octaves makes frequency adjustments feel more intuitive and grounded in how we naturally think about music. When EQing, I typically cut with narrower bands, often about an octave wide, to address specific issues. On the other hand, when boosting, I prefer using wider bells, spanning two or more octaves, to shape the tone more musically.
However, not all octaves are perceived equally. Our ears are most sensitive to the 1–5 kHz range (roughly octaves 6–8 on the frequency spectrum), where our hearing is naturally tuned to detect detail—an evolutionary trait that likely developed for survival. This range encompasses the majority of human speech, and our sensitivity to subtle nuances within it has been essential for communication and fostering social bonds throughout history.
That may be a bit too much evolutionary context for this conversation about EQing your mix, but this 2.5-octave range demands our attention. Our ears are particularly attuned to this area and are highly sensitive to imbalance, excessive transients, and shifts in loudness. Getting it right can dramatically affect how the listener perceives loudness, balance, and presence in your mix.
Thinking in octaves can transform your approach to EQ, shifting it from a technical grind to a more natural, gestural, and musical process. By mastering the fundamentals of EQ, compression, and saturation, you’ll discover that many “problem-solving” tools—like resonance suppressors (e.g., Soothe 2)—are often used to address balance issues that could be resolved with better EQ techniques. While these tools have their place in specific scenarios, they are frequently overused in modern music production.
By understanding how octaves relate to the music we create, you can map your EQ decisions more effectively to the issues you hear in a mix. This empowers you to make more informed choices and reduces reliance on complex modern resonance tools, which can inadvertently introduce unwanted artifacts that often go unnoticed.
In Part 2, we’ll dive deeper into the individual frequency bands. We’ll talk about common issues, how to tackle them, and how to keep your mixes musical and balanced.
Have questions? Just hit reply, and we’ll get back to you. You can also tag us on instagram—we’re always happy to connect!
Be well,
Ryan Schwabe
Grammy-nominated and multi-platinum mixing & mastering engineer
Founder of Schwabe Digital


EQing in Octaves: Part 2
Last week, we explored how thinking in octaves can simplify your EQ process, making it feel more musical and intuitive. Today, we’ll take that concept further by dividing the 10 octaves into 5 key frequency bands—low, low-mids, mids, high-mids, and highs—and discussing how each band shapes our perception of sound. This week, we’ll focus on the first three bands and cover the remaining ones next week. Conveniently, each of the 5 bands spans roughly two octaves. Let’s explore them.
Last week, we explored how thinking in octaves can simplify your EQ process, making it feel more musical and intuitive. Today, we’ll take that concept further by dividing the 10 octaves into 5 key frequency bands—low, low-mids, mids, high-mids, and highs—and discussing how each band shapes our perception of sound. This week, we’ll focus on the first three bands and cover the remaining ones next week. Conveniently, each of the 5 bands spans roughly two octaves. Let’s explore them.
Lows: Octaves 1 & 2 (20–100 Hz)

As mentioned, the lowest frequency we can hear is 20 Hz. The lowest musical note we can hear is a low E, one octave below the E on an electric bass, at 20.6 Hz. This means the two low-frequency octaves range from 20 Hz to about 80 Hz. However, in practice, each band spans roughly 2.5 octaves, with some overlap between what is considered a low band and a low-mid band, or a high-mid band and a high band. In practice, the low band is commonly defined as 20 Hz to 100 Hz.
Let’s take a closer look at the low band and its role in most popular music. As you can imagine, in rhythm-section-oriented popular music, the kick and bass dominate the fundamentals of this band. I like to think of it as the foundation on which a balanced mix is built.
One approach I sometimes use is to solo the kick, bass, and vocal to evaluate how the power of the low end balances with the energy of the vocal. It’s a quick and effective way to judge the level relationship between two fundamental parts of modern music: the power of the bass and the diction as well as the message of the vocal. This method serves as a great temperature gauge, helping you reassess vocal effects, the relationship between low-frequency instruments, and how much space is left for the rest of the instruments to fit cohesively into the mix. While I am often skeptical of making any major decisions about a mix while in solo, listening to an acapella and bass has provided me with useful perspective.
The graph below shows the average spectral balance of #1 hits in the US and UK from 1950 to 2010 (AES, 2013).

In most popular music mixes, low frequencies dominate the spectrum due to the interaction between the bass and kick. The frequency balance in these #1 hits is anchored by energy centered around 80 Hz, with a sharp roll-off below 60 Hz. Higher in the spectrum, the balance follows a linearly decaying slope of approximately 5 dB per octave between 100 Hz and 4 kHz, with progressively steeper attenuation at higher frequencies. The balanced power of the low frequencies plays a crucial role in your limiter's performance, the perceived loudness of your track, and the dynamic response of your mix on consumer playback systems.

Many streaming services use K-weighted filtering (part of LUFS measurements) to mimic how our ears perceive loudness, focusing on frequencies where human hearing is most sensitive. This filtering de-emphasizes deep sub-bass frequencies, allowing producers to push sub-bass louder without significantly increasing the impact of volume normalization on a track’s loudness on streaming platforms. However, excessive deep low-end can compromise a limiter's ability to make a master sound loud and present before loudness normalization, making it a delicate balancing act to set the right amount of low-end energy.
Key Tips
Focus on dialing in the relationship between your kick and bass within the first and second octaves. Typically, the kick will dominate one octave while the bass occupies the other. Which octave each instrument primarily occupies depends on the production style and the song itself.
Adjust the low end in relation to the rest of the mix by using a low-frequency shelf that evenly boosts or cuts both low-frequency octaves.
Cut sub-bass frequencies below 25 Hz to clear up your mix and increase headroom. I prefer using low-frequency shelves over high-pass filters (HPFs) because they are more transparent and avoid phase shifts or added harmonics. Even though K-weighted filtering discounts low frequencies, these still consume the most energy in your mix and can cause unpleasant artifacts in your limiter, especially in over-compressed masters.
For a deeper dive, check out my low-end balancing blog post linked below. In that article, I outline a simple three-band strategy for managing low frequencies in your mix.
Low-Mids: Octaves 3 and 4 (100–400 Hz)

The low-mids are where the fundamentals of chords and melodies, the body of drums, and the chest of a vocal performance reside. Since the fundamentals of most instruments and vocals often live here, it’s easy for frequencies in this range to pile up. Be cautious, though—cutting too much in the low-mids can make a mix feel overly scooped and lacking in body or wholeness.
When I refer to the 'fundamental' of an instrument, I’m talking about the primary notes that make up a chord. For example, on a piano, A440 (440 Hz) is the fundamental frequency of the root note in an A minor chord. The minor third, C, is at 523.25 Hz, and the perfect fifth, E, is at 659.26 Hz. When you examine this chord on a spectrogram, you’ll see that the fundamental frequencies dominate the energy. In contrast, the subharmonics below and the harmonics above—which shape the timbre of the sound—contribute significantly less energy.

A common production mistake is stacking too many instruments in the same frequency range. When chords and instruments with fundamentals in the same range are layered, it can cause a significant buildup of density and loudness in the low-mids relative to the rest of the mix. This is why songs with fewer layers of instruments often result in a louder and clearer final master. With less low-mid frequency duplication and buildup, the energy of the production feels more balanced and open.
This is also why many producers and mix engineers embrace the concept of “production through reduction.” Simplifying and minimizing the arrangement of instruments occupying the fundamental frequencies allows each element to breathe, aligning with the human ear's preference for fewer competing elements at once.
Instead of boosting the top end to make an instrument sound brighter, try cutting in this range and raising the instrument’s overall volume. This approach preserves the integrity of the high frequencies, avoiding any potential artifacts from processing, while simultaneously reducing weight in the low mids. With this method, you’ll often achieve a cleaner and more natural result.
Exploring Alternative EQ Approaches
Similarly, I’ve experimented with working in powers of 10 instead of the traditional octave-based system we are currently discussing. While octaves function by doubling or halving a frequency, this approach involves making strategic adjustments at frequencies related by factors of 10.
For example:
To make 2 kHz feel more energetic, cut at 200 Hz and raise the volume.
To make a mix feel warmer around 400 Hz, use a wide bell cut at 4 kHz and raise the volume.
This approach is effective because it indirectly alters the balance and perceived energy of a target frequency without applying any processing to it.
Mids: Octaves 5 and 6 (400 Hz – 1.5 kHz)

The midrange, traditionally spanning 500 Hz to 2 kHz, is where the core frequencies of most instruments converge, making it the area where EQ adjustments have the greatest impact on an instrument's size and presence. The upper midrange, aligned with the Fletcher-Munson curve, corresponds to the frequencies where our ears are most sensitive—earning it the reputation as the 'size control' for a mix.
Frequency masking often occurs in this range, and pushing the mids too far forward can make instruments feel overly aggressive or 'shouty.' Additionally, overemphasizing the mids can lead to issues with loudness normalization, causing your mix to sound smaller compared to others.
For example, a gentle, wide boost around 1 kHz can help a vocal stand out, while cutting a competing instrument in the same range can unmask the vocal. If you push this range beyond a natural balance, it will cause loudness measurements to register the mix as louder, resulting in lower playback levels.
Practical Application
For Larger Vocals: Boost with a wide bell around 1kHz or 1.5kHz. Think of this as a size knob for anything in your mix. If you want something to feel bigger (and it’s not overly compressed), boost here, and it’ll grow.
For mastering, use mid-side EQ to push the vocal forward or pull it back. Solo the mid channel and sweep through the frequencies to identify the spot where the vocal stands out most relative to the other instruments. This range might not always be where you'd expect. Focus not on the vocal's fundamental frequency but on the range where it feels most separated or independent from the other sounds in the arrangement. Once you find it, adjust the gain in that range to subtly change the vocal's placement in the mix.
The lows, low-mids, and mids form the backbone of your mix, shaping its depth and power, warmth, and overall presence.
Next post, we’ll dive into the high-mids and highs—where clarity and energy live. These ranges can bring your mix to life or make it harsh if not handled carefully. See you then!
Have questions? Just hit reply, and we’ll get back to you. You can also tag us on instagram—we’re always happy to connect!
Be well,
Ryan Schwabe
Grammy-nominated and multi-platinum mixing & mastering engineer
Founder of Schwabe Digital

EQing in Octaves: Part 3
Last week, we explored the lows and mids—the fundamental frequencies that give your mix its weight, warmth, and power. Today, we'll focus on the high-mids and highs, where brightness and articulation live. These frequencies are crucial for bringing excitement and clarity to your mix, but they require precise placement to avoid harshness. Let's talk about how to craft a top end that's clear, balanced, and musical.
Last week, we explored the lows and mids—the fundamental frequencies that give your mix its weight, warmth, and power. Today, we'll focus on the high-mids and highs, where brightness and articulation live. These frequencies are crucial for bringing excitement and clarity to your mix, but they require precise placement to avoid harshness. Let's talk about how to craft a top end that's clear, balanced, and musical.
High-Mids: Octaves 7 and 8 (1.5–6 kHz)

Our ears are remarkably sensitive to frequencies in the high-mids—a trait rooted in evolution. This range, where the human voice naturally resonates, is critical for speech intelligibility and the brightness we associate with clarity in music. Our ears are finely tuned to pick up the most detail in this range—not by chance, but because it’s how we’ve evolved to communicate and survive in groups.
If your mix sounds harsh, piercing, or fatiguing, the high-mids between 2 kHz and 8 kHz are often to blame. Elements in this range can easily turn an engaging mix into an exhausting one if they’re too prominent.
For example, an overly pokey attack time on a compressor applied to an instrument in this range can push it too far forward, making it irritating. On the other hand, overusing a resonant suppressor like Soothe2 and stripping away too much transient detail can leave your mix sounding distant, dull and lifeless.
It’s not just the loudness in this frequency range that matters—it’s also the shape and intensity of the transients. Psychoacoustically, our ear associates transients in this range with something near or approaching—something potentially dangerous—so it demands our attention. A lack of transients, on the other hand, signals distance.
This response is hardwired into us—an instinctive reaction shaped by evolution to help us survive and detect threats. These same principles apply to mix depth. Reducing mids and transients creates a sense of distance and lowers attention, while boosting them brings elements forward, increasing perceived closeness and focus.
Key Tips:
If your mix feels harsh or fatiguing, check the high-mids (2–8 kHz). Use subtle EQ cuts to tame resonances without killing clarity. Balance is the goal—not dullness. Avoid excessive tight cuts to prevent phase smearing.
The transient shape in this range influences both the perceived loudness and the depth of a sound in the mix, determining whether it sits forward or further back. Sudden transient bursts push sounds forward and draw our attention, but they can also cause ear fatigue. Excessive transient control, on the other hand, pushes sounds backward and can make a mix feel distant and lifeless. These are the extremes—explore them, but don’t ignore the middle ground.
How you shape transients with compression, saturation, and distortion is crucial for defining both loudness and front-to-back placement of instruments in the mix.
Highs: Octaves 9 and 10 (6–20 kHz)

The highest octave in a mix is where air and overtones live. It’s not about distinct musical notes but rather the harmonic definition that gives sounds their sense of openness and space. This is where cymbals shimmer, vocal articulations like 'esses' and 'Ts' cut through, and instrument textures come alive.
Personally, I find that frequencies above 17 kHz often sound harsh in digital recordings—maybe a hot take, but it’s been a consistent observation. For example, I frequently use a low-pass filter on vocals between 13–18 kHz to tame distracting or overly bright frequencies. The SSL 9000 LPF is great for this.
However, if you ask a seasoned engineer, they might disagree because they historically used tubes and tape, which naturally softened and compressed these frequencies.
Quick bursts of energy in the highest octave can be especially fatiguing. Our ears enjoy brightness but recoil from excessive dynamics and resonance in the high-end. It’s not just about volume—it’s about the shape of those frequencies. Sudden boosts in the lows, like sub-bass, feel powerful and satisfying. But sudden spikes in the highs? They pierce our ears, triggering discomfort and alarm.
Managing the dynamics of this range is key to creating a mix that’s bright and open without being harsh. When balanced correctly, the highest octave can make a mix feel expansive and alive, as if it’s breathing—but overdo it, and the mix can quickly become brittle or fatiguing.
Key Tips
Sudden bursts in the highs—like an uncontrolled 'ess' or harsh cymbal—can be piercing. Start by adjusting their intensity with shelves or a low-pass filter. If the top end is too dynamic, use de-essers, tape emulations, or dynamic EQ to tame the peaks, adjusting attack time carefully. Don’t shave the transients off—right-size them for the mix. Our next plugin HiFAL is built for this, giving you effortless control over high-frequency transients.
Selective boosts around 8 kHz help vocals and lead instruments pop forward in the mix. This frequency adds presence while remaining musically connected, unlike the more airy "sizzle" of 12 kHz and above. Keep the boost subtle to avoid harshness or excessive brightness. While your instinct might be to make things brighter, sometimes reducing density in the low-mids and dynamically controlling the highs is a more effective way to achieve clarity and balance. Again, the transient shape and dynamics are as important as the level.
Making EQ Decisions That Matter
Thinking in octaves can simplify your EQ workflow, making it feel more musical and less like a technical chore. Instead of getting bogged down in the specifics of thousands of Hertz, simplify your approach with 10 octaves: use wide bells (1 octave or more) to boost and add character, and narrow bells (1 octave or slightly less) to clean up problem frequencies.
In an era of tools like Pro-Q4 and Soothe2, sleek interfaces can lead us to overthink and fix problems that don’t need fixing. While these tools are valuable, mixing and mastering are often simpler than we make them out to be. If your EQ moves start resembling a science experiment, you’ve likely gone too far.
Keep it simple—think in octaves and approach EQ with intent. This mindset aligns technical choices with musical goals, making EQ decisions feel more gestural and intuitive. Also, remember that transient intensity and shape play a major role in how we perceive harshness.
Thats it for now. In the next email, I'll discuss how tweaking our listening environment to balance perceptual bias can help us create mixes that translate across different playback systems.
Have questions? Just hit reply, and we’ll get back to you. You can also tag us on instagram—we’re always happy to connect!
Be well,
Ryan Schwabe
Grammy-nominated and multi-platinum mixing & mastering engineer
Founder of Schwabe Digital

Reviving Loud & Limited Pre-Masters with GOLD CLIP
As a mastering engineer, I’m often handed mixes that are already limited or clipped. These loud, finalized mixes can be tricky to work with because there’s often very little headroom or transient detail left. What I do as a mastering engineer involves envelope or dynamic shaping just as much as balancing, sweetening, and preparing a mix for distribution.
As a mastering engineer, I’m often handed mixes (pre-masters) that are already limited or clipped. These finalized mixes can be challenging to work with because they are already heavily limited, leaving little transient detail. As a mastering engineer, my work often includes envelope and dynamic shaping just as much as balancing, sweetening, and readying a song for distribution.
The Challenge of Loud Mixes
When I receive loud mixes, my ability to shape the envelope is reduced because the transients have been chopped away beforehand. While I usually request a separate, lower-level pre-master for more flexibility in handling transients, some mixing engineers prefer to stick with their loud mixes—and that’s perfectly fine.
The question is: what purpose does a clipper serve in a mix that’s already limited and clipped?
You might think a clipper has no role here. After all, if the transients are already clipped or limited, what more could a clipper possibly do? The answer lies in what makes Gold Clip so much more than just a clipper.
Gold Clip: Not Just a Clipper
Gold Clip isn’t just a traditional clipper—it’s a versatile tool equipped with internal processors specifically designed to refine limited or clipped signals, making it perfect for handling loud pre-masters. Every element in Gold Clip is bypass-able, allowing you to adapt it to the needs of your mix. For tracks that are already clipped or limited, you can turn off the clipping and saturation components while leaving on Box Tone and Alchemy. These processors can then work independently to smooth and soften clipping artifacts.
In my latest YouTube video, I explain how I use Box Tone and Alchemy to smooth and refine heavily limited or clipped mixes.
What You’ll Learn in the Video
🎛️ How Modern Box Tone smooths the top end, filters out harsh ultrasonic frequencies, and refines loud mixes.
⚙️ How Alchemy dynamically softens harsh peaks by emulating high-frequency compression, but without relying on traditional attack and release times. Instead, it behaves more like the natural smoothing effect of tape magnetization.
💡 Why Gold Clip’s bypass-able design makes it a versatile mastering tool, allowing you to use its processors as standalone tools for smoothing clipped or limited pre-masters.
If you’ve ever struggled with mastering loud, limited mixes, this video will give you some new ideas on how Gold Clip might help.
Check it out below:
Have questions? Just hit reply, and we’ll get back to you. You can also tag us on instagram—we’re always happy to connect!
Be well,
Ryan Schwabe
Grammy-nominated and multi-platinum mixing & mastering engineer
Founder of Schwabe Digital


GOLD CLIP PACK is OUT NOW!
We have exciting news for GOLD CLIP users!
To show our appreciation for your support, we're upgrading all Gold Clip users to the new GOLD CLIP PACK!
Gold Clip Pack includes the original Gold Clip that you know and love, plus the FREE add-on plugin, GOLD CLIP track.

We have exciting news for GOLD CLIP users!
To show our appreciation for your support, we're upgrading all Gold Clip users to the new GOLD CLIP PACK!
Gold Clip Pack includes the original Gold Clip that you know and love, plus the FREE add-on plugin, GOLD CLIP track.

PUT SOME GOLD ON IT
We’ve heard from many of you about how you use Gold Clip throughout your mixes, so we created Gold Clip Track to make that process even easier. This simplified version is optimized for track-level use, with a sleek interface that’s easier on your CPU and reduces plugin delay to just 5% of the original Gold Clip.
Now, you can effortlessly insert our renowned clipping and gold saturation on individual tracks in your mix without hesitation. Gold Clip Pack will fit seamlessly into every part of your mixing and mastering workflow, giving your mixes the excitement and loudness they deserve. While the original, more robust version of Gold Clip excels on your master fader, Gold Clip Track is ideal for adding energy and saturation to individual tracks.
At Schwabe Digital, we’re committed to designing tools that enhance the way you work. With Gold Clip Pack, you’ll discover new and inspiring ways to mix and master your music.
If you already own Gold Clip, your Gold Clip Pack license is available in your iLok account right now. Just log in to your iLok app, activate the Gold Clip Pack license, and download Gold Clip Track from your Schwabe Digital Account. Learn more about the Gold Clip Pack upgrade authorization process here.
GOLD CLIP track is FREE for all GOLD CLIP users and is NOT sold separately. Going forward, all new Gold Clip purchases will be sold as the full Gold Clip Pack.
Log in to download GOLD CLIP track today.
Tag me on my @SchwabeDigital instagram and let me know what you think..
Be well,
Ryan Schwabe
Grammy-nominated and multi-platinum mixing & mastering engineer
Founder of Schwabe Digital


Mastering Secrets & Musical U-Turns: My Chat with Mike Indovina
I recently spoke to Mike Indovina of the Master Your Mix Podcast about how you can use clipping to your advantage.
I recently joined Mike Indovina on the Master Your Mix Podcast to share how you can use clipping to your advantage in your mixes.
We also explored the unexpected twists in my music career, my approach to mixing and mastering, and the reasoning behind when I reach for digital tools over analog gear.
If you're curious about the techniques and philosophy that define my approach to mixing and mastering—or if you just want an honest, unfiltered conversation about music—this episode is for you.
Take a listen below and let me know what you think. Hit reply or tag me on my @SchwabeDigital instagram.
Be well,
Ryan Schwabe
Grammy-nominated and multi-platinum mixing & mastering engineer
Founder of Schwabe Digital

Songs Made with Gold Clip
Below are some legendary engineers that are making music with a little help from Gold Clip. Read how they are using it and take a listen.
Below are some legendary engineers that are making music with a little help from Gold Clip. Read how they are using it and take a listen.
Stuart White (mixer)
Beyonce - Cowboy Carter
“I used Gold Clip on a few tracks from Cowboy Carter. I had it inserted on my aux groups clipping some peaks off.”


Bainz (mixer)
Young Thug - Oh U Went (ft. Drake)
“Gold Clip was the last plugin on the mix with a little bit of gold for Young Thug’s ‘Oh U Went’”

Jon Low (mixer)
Maya Hawke - “Missing Out”
“I have an instance of Gold Clip on the drum bus that's integral to the drum sound. It's acting slightly like a limiter through the clipping section in Classic mode. Classic Gold processing is at over 4db, really filling in some of the low level detail. On an acoustic drum kit, it adds excitement and punch in a totally different way than compressing. Gold Clip is also on the mix bus just doing a little work. The clipping is no more than 1-2db since the drum transients are already controlled early on.”

Tony Maserati (mixer)
Jesse Reyes - “SHUT UP (ft. Big Sean)”
“Used Gold Clip on this mix and so many more”

Benjamin Thomas (mixer)
Lil Uzi Vert - “Endless Fashion (ft. Nicki Minaj)”
“I used Gold Clip on the drum bus and the mix bus and every mix I have done since it came out.”

Chris Tabron (mixer)
Jensen McRae - “Massachusetts”
“In the year since I've been using Gold Clip, I've gone from putting it on at the end of a mix for just a dash of magic, to getting it in the chain fairly quickly after my balances and making lots of decisions through it. Just a bit of Gold Processing, and a touch of Alchemy gives me something inspiring to push into, without sacrificing any fidelity. You can hear this most recently on Jensen McRae's latest single Massachusetts.”

Ryan Schwabe (mixer)
BAYNK - “Blood”
“This song is intentionally crunchy sounding. I used Gold Clip on the mix bus with 4dB of Classic Gold to make it sound like the record is bleeding a bit.”


One Year of Gold Clip
From launch to legend, GOLD CLIP has come a long way in one year. Several months before the release, I started an Instagram to talk my way through the making of Gold Clip.

From launch to legend, GOLD CLIP has come a long way in one year.
Several months before the release, I started an Instagram to talk my way through the making of Gold Clip. I made endless memes, bleached my hair gold, and sh*t posted my ride through the long and difficult development process. I made the project an open diary and chaotically posted "coming soon" everyday. A lot of you made suggestions along the way and even got involved in Gold Clip’s early development. Many of those comments and DMs were instrumental in what it is today. It was a wild ride and I never expected how long it would take to get over the finish line. And once I crossed that line, I didn’t expect it to end up in the hands of so many legendary creators around the world.
At the time of the release, I was an Associate Teaching Professor of Recording Arts and Music Production at Drexel University's music industry program and a full-time mixing and mastering engineer. Originally, I built Gold Clip for my own work as an engineer. It was a passion project that took over my life for nearly three years. Every dollar I made in music I dumped back in to Gold Clip. My music friends grew tired of hearing me ramble on and on about compression without attack and release. It was a long ride, but I had some trusty co-pilots and I just kept it moving. I told myself that if I didn't use Gold Clip in my own work, then I wouldn't release it. And that has been the ethos for all of my plugins since.
Schwabe Digital is here to stay. I can't tell you too much about my future plans right now, but I am making some new and innovative tools. First, we will release our debut FREE plugin - something simple and cool for the culture. Then, I cannot wait to share with you the next device, a FREE add on plugin for all Gold Clip owners. Gold Clip will become Gold Clip Pack. We are grateful for all of your support and want to give back to what you all started. After all that, we will release a new groundbreaking plugin that I have been using on all of my masters since the first alpha version. More on all of that later.
Be well,
Ryan Schwabe
Grammy-nominated and multi-platinum mixing & mastering engineer
Founder of Schwabe Digital


What’s the Difference Between GOLD CLIP and ORANGE CLIP?
I often get this question…
What’s the differences between Gold Clip and Orange Clip?
GOLD CLIP is a clean, high-precision mastering tool that uses its unique loudness technology called Gold and Alchemy to create exceptionally smooth and loud masters. It sounds lush, expensive, bold, and gives recordings the last 5% of detail we all strive for. It emulates a well-known golden mastering device used on thousands of hit records, and builds on that distinctive dynamic process with advanced anti-derivative, anti-aliasing oversampling technology.
ORANGE CLIP is a loud and aggressive production & mixing clipper that emulates the sound of a legendary DAW for music production. It can be driven hard for added bite or used subtly for warmth and character. It is a color box, enhancing lows, smoothing the mids, and flattening the high end in a unique and pleasing way. While not transparent, it is a familiar tone we have all grown to know and love. With minimal CPU usage and 0 samples of delay, it’s easy to incorporate Orange Clip into your production workflow.
Should I use ORANGE CLIP and GOLD CLIP together?
YES, there are no rules and each clipper has its unique and distinctive sound.
GOLD CLIP is often used to maintain clarity, increase perceived loudness, energy and detail of the whole mix or grouped instruments.
ORANGE CLIP is often used to provide aggression, color, character, and to shape transients of individual or grouped instruments in a mix.
Check out this short video on why I built Orange Clip
Be well,
Ryan Schwabe
Grammy-nominated and multi-platinum mixing & mastering engineer
Founder of Schwabe Digital

Using Orange Clip & Gold Clip Together
A few weeks back, my friend Ken Lewis asked me to make a video about how I use Gold Clip and Orange Clip for his Mixing Night Podcast. I decided to throw that video on my YouTube page and share it with you.
A few weeks back, my friend Ken Lewis asked me to make a video about how I use Gold Clip and Orange Clip for his Mixing Night Podcast. I decided to throw that video on my YouTube page and share it with you.
In the video, I first show how I use GoldClip in a clean and transparent way on a master for a blues song. Then, I use both Orange and Gold Clip together to make an electronic record sound aggressive and over the top.
Take a listen below and let me know what you think. Hit reply or tag me on my @SchwabeDigital instagram.
Be well,
Ryan Schwabe
Grammy-nominated and multi-platinum mixing & mastering engineer
Founder of Schwabe Digital
Designer of Gold Clip & Orange Clip
p.s. If you haven't already, you can buy or rent-to-own ORANGE CLIP right here.

Celebrating 6 Months of Gold Clip!
Today marks the 6-month anniversary for the release of GOLD CLIP. I want to take this time to thank you all for the support and love you have shown.

Today marks the 6-month anniversary for the release of GOLD CLIP. I want to thank you all for the support and love you have shown. Especially to those who followed my journey on IG while I was sh*t posting my way through the Gold Clip development process.
2024 will be a big year for Schwabe Digital. We are releasing our second plugin early next year. That release will be a fun production- and mix-focused plugin. Watch out for that announcement early next year.
Then, shortly after that, we will release another mastering tool that will complement Gold Clip. That plugin has been on all of my masters since the first version I received from my development team. It sounds stunning.
And finally, we will release our third mastering tool at the start of 2025. All the while, we will continue to maintain and upgrade Gold Clip.
Gold Clip has been adopted by some of my favorite mixing and mastering engineers. Bains, Teezio, Jesse Ray Ernster, Ben Thomas, Jon Low, Nicolas de Porcel, Tony Maserati, Justin Perkins, Eric J. Dubowsky, and so many more are using Gold Clip.
Gold Clip has made its way on to countless hit records from Burna Boy, Doja Cat, Kanye West, City Boys, ODESZA, Lil Uzi Vert, OFFSET, Mariah the Scientist, Fridayy, Chris Brown, DJ Shadow, Lady Blackbird, Tee Grizzley, Cochise and thousands of others.
Tag @SchwabeDigital in an instagram story and show us what records you have been using Gold Clip on. We'll repost.
I am so excited to bring new and exciting tools to the production and engineering space in 2024. Please stay tuned.
Thank you all for following along, sharing and showing support!
Be well,
Ryan Schwabe
Grammy-nominated and multi-platinum mixing & mastering engineer
Founder of Schwabe Digital
The New GOLD CLIP 1.2.1 is Here!
We have an updated interface, new oversampling options, a new downsampling filter technique, and some long-requested new features.
We are very excited to bring you GOLD CLIP version 1.2.1!
We have an updated interface, new oversampling options, a new downsampling filter technique, and some long-requested new features. Plus, we reset all 30-DAY FREE TRIALS. Check out all the new tech below.
Oversampling Upgrades
GOLD CLIP 1.2.1 allows you to choose between three different oversampling options: High, Pristine and Extra Pristine. You can also choose a different sampling rate for Real Time processing and Offline bouncing.
High - 4x (44.1kHz & 48kHz), 2x (88.2kHz and 96kHz+)
Pristine - 8x (44.1kHz & 48kHz), 4x (88.2kHz and 96kHz+)
Extra Pristine - 16x (44.1kHz & 48kHz), 8x (88.2kHz and 96kHz+)
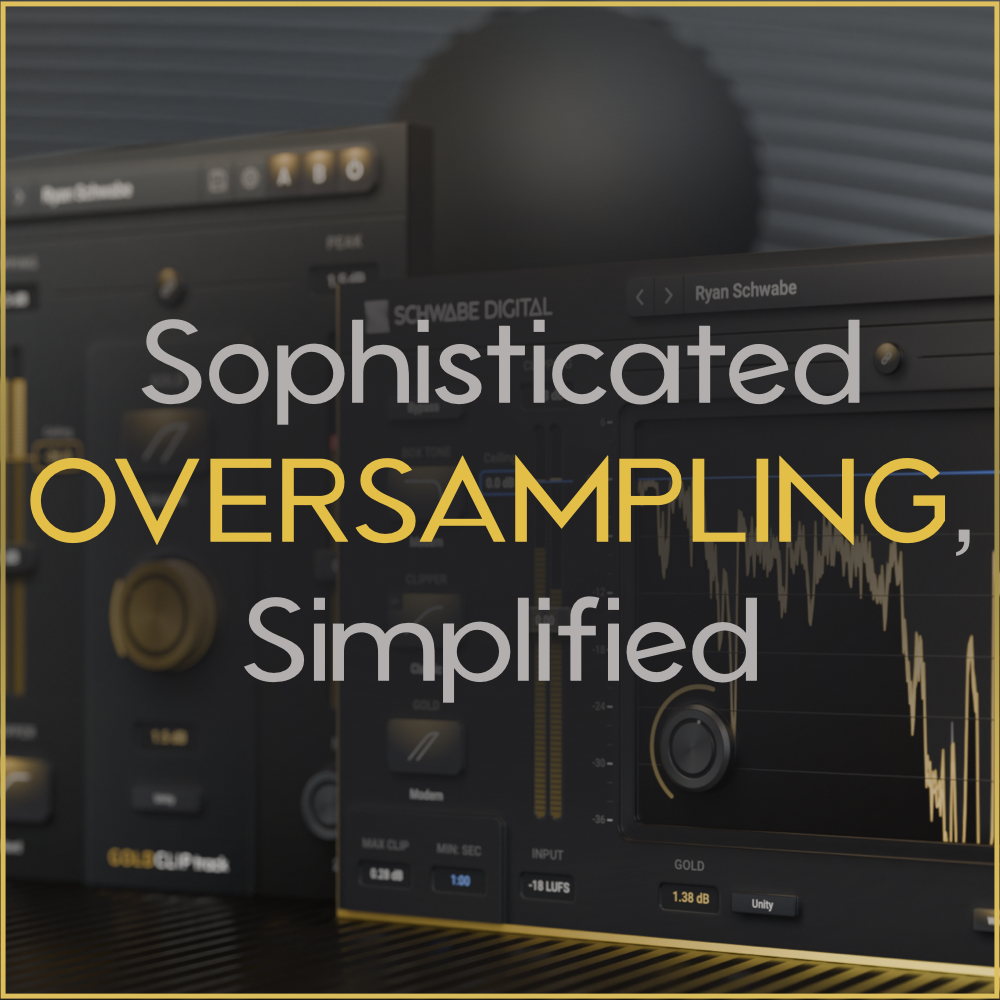
Oversampling Type - The long-requested Linear-Phase and Minimum-Phase oversampling options are now available in the settings window of Gold Clip. Both oversampling approaches use a newly designed amplitude-modulated downsampling filter and antiderivative anti-aliasing processing.
Interface Updates
The Tooltips have been moved to the front page and a settings page gearbox icon has been added.

The Clip Filter has been moved to the top left of the clipper selection button.

Both AB states now save with your session and you can toggle between A and B without moving the mouse from A to B. Close your eyes, click and make your decision.

AAX - Pro Tools automation quick keys added.

The Settings page has been redesigned.

Gold Clip 1.2.1 is now available in the downloads folder in your Schwabe Digital account.
Also, the 30-day free trial period has been reset. If you tried Gold Clip before and you want to try it again, now is the time.
Tag @SchwabeDigital in an instagram story and show us how you are using the new GOLD CLIP.
We'll repost.
Be well,
Ryan Schwabe
p.s. Subscribe below for updates on Schwabe Digital Plugins.

01) Introducing GOLD CLIP PACK: More Than a Clipper
GOLD CLIP is much more than just another clipper.
Gold Clip Pack is a family of plugins designed to bring loudness, saturation, and energy to your mixes and masters. It includes both a Mastering Clipper and a Track Clipper, powered by the same advanced internal technology. With unique features like Boxtone, the digital tape-style dynamic processor Alchemy, a parallel mixer, and anti-overshoot oversampling, these tools help you craft mixes and masters with loudness and impact.

GOLD CLIP PACK is much more than just another clipper.
Gold Clip Pack is a family of plugins designed to bring loudness, saturation, and energy to your mixes and masters. It includes both a Mastering Clipper and a Track Clipper, powered by the same advanced internal technology. With unique features like the Gold loudness processor, Alchemy digital tape-style dynamics, Boxtone tone shaping, a True Parallel mixer, anti-overshoot oversampling, Clip Clock, Input and Output Trim Linking, and dynamic range visualization, Gold Clip Pack gives you the control to shape your mixes and masters with loudness and impact.
It’s a simple tool, but underneath lies complexity. Yes, it’s a clipper, but it’s so much more than that. Once you fully understand Gold Clip, you’ll unlock a wide palette of sounds—from aggressive and dirty to clean and pristine. Over the next few weeks, I’ll send you a few email tutorials and videos to help you unlock the power of Gold Clip.
I promise that if you take a few minutes to read or watch each one, it will vastly improve the results you get from this unique tool.
WHAT DOES GOLD CLIP PACK DO?
Gold Clip is a clipper, loudness saturator, mid-to-high frequency peak processor, distortion device, box tone generator, clip clock, and true parallel mixer.
It can serve as a mastering processor, a unique dynamic effect for mixing, or a creative tool for production. Gold Clip can be clean and reserved or loud, aggressive, and distorted.
Gold Clip includes two loudness saturation algorithms, both called Gold, as well as a unique mid-to-high frequency peak processor called Alchemy. Both processors are integrated into the clipping algorithm to deliver a maximally smooth and loud master.
THE THREE MAIN FUNCTIONS
The Clipper is inspired by the overloading effects of two famous mastering converters. We named them Modern and Classic. There is also a clean clipper that we cooked up for you called Hard. These three clippers are like no other digital clippers out there. Try pushing your mixes into them and see how smooth and natural they sound. And the clipper isn't even the best part, but it is a necessary step to make Gold processing possible.
Gold processing uses a clever loudness technique that enhances quiet sounds in your mix, without altering the peaks. I like to call it compression without consequence, but in reality, it is compression without attack and release. Use the input trim to boost your mix up to the clipper's ceiling, add some Gold, and experience the power of this incomparable dynamic effect.
Alchemy is a peak processor that operates in the mid to high frequencies, reducing harshness and unwanted clipping effects. As the signal reaches the clip point, Alchemy gently softens the mid to high frequencies. I like to think of it as digital tape because it can take the ugly bite out of a mix when things get loud.
Check out this short Gold Clip video on YouTube.
Let me know what you think. Hit reply or tag @SchwabeDigital in an instagram story and show us how you are using Gold Clip. We'll repost.
In the next blog, I'll show you a simple and effective way to get the most out of Gold Clip Pack.
Be well,
Ryan Schwabe
Grammy-nominated and multi-platinum mixing & mastering engineer
Founder of Schwabe Digital
p.s. If you REALLY want to go deeper, click here to read the full Gold Clip Pack manual.

02) Get Quick Results with Gold Clip Pack
This is a simple, straightforward way to use GOLD CLIP for mixing and mastering in any genre.
In the previous blog, you got a sneak peek into GOLD CLIP and some of its unique features. Today, we're going to cover a simple, straightforward way to use Gold Clip for mixing and mastering in any genre.
The Seven Steps to Loudness
1. Put Gold Clip on the first open insert slot on your master fader. I typically put my final limiter in the last insert slot... what goes in between is up to you.
2. Use Gold Clip's default preset and make sure the I/O Trims are linked by clicking the 🔗 symbol above the waveform display.
3. Navigate to the loudest part of the song and increase the input trim until you see 1 dB or less of clipping. Why not more? While Gold Clip excels at clipping, its true magic lies in Gold processing. Excessive clipping reduces Gold processing's transparency, so we’ll lightly clip the track to let it shine. To fully capture Gold's compression curve, push the signal just below the clip point.
4. Add 1 dB to 2.5 dB of Modern Gold processing and then set your final limiter to a loudness level that you think is appropriate for the production. The more Gold you add, the less final limiting you will need.

5. To smooth things out more, add up to 1 dB of Alchemy processing to taste.

6. Audition the Modern and Classic Box Tones.

7. Toggle the internal bypass and hear the magic of Gold Clip.
That's it!
Using this straightforward setup for mastering or mixing ensures you get the best results from Gold Clip's unique GOLD processing. With Gold Clip Track, the optimized version for track inserts, you can apply that sound to every element of your mix with reduced latency and CPU usage.
You can think of Gold as a compressor without attack and release - it sounds clean, expensive, and adds a powerful dynamic effect to your mixes and masters.
It's like no other plugin out there.
Let me know what you think! Hit reply or tag @SchwabeDigital in an instagram story and show us how you are using Gold Clip. We'll repost.
In the next blog, we'll talk about how gain staging works within Gold Clip.
Be well,
Ryan Schwabe
Grammy-nominated and multi-platinum mixing & mastering engineer
Founder of Schwabe Digital

03) Gain Staging in Gold Clip Pack
Don't be intimidated. While the internal gain staging of GOLD CLIP is complex, the functionality on the interface is very simple. Once you understand it, you'll be ready to use the plugin in any scenario.
Don't be intimidated. While the internal gain staging of GOLD CLIP is complex, the functionality on the interface is very simple. Once you understand it, you'll be ready to use the plugin in any scenario.
There are four elements that affect gain and they flow like this:
Input Trim --> Clipper Ceiling --> Parallel Mixer --> Output Trim
The Input Trim affects the input level, and Output Trim affects the total plugin output after the parallel mixer. They both float over the I/O meters and look like this.

The I/O Trims are linkable by clicking the 🔗 symbol above the waveform display shown below.

Linking the I/O Trims lets you alter the internal gain staging of Gold Clip and maintain perceived loudness. Basically, when you turn the Input Trim up 1dB, the Output Trim automatically goes down 1dB.
Trim Link Offset

Trim Link Offset allows you to change the gain relationship between the linked input and output. Set your input and output levels, click the link button and your IO Trim relationship is maintained.
- Shift-Drag either fader to change the offset.
- Shift-Option-Click a fader, and the offset is reset to 0 dB.
- Or, turn linking off, make an adjustment, and then turn linking back on.
It is as easy as that. Trim Link Offset is also available in Orange Clip.
The Clipper Ceiling control moves the clipper ceiling, and the knee of the Gold and Alchemy processors down from 0.0dBFS to as low as -36dBFS. This control is most useful when processing lower-level signals like individual tracks in a mix.

The Parallel Mixer allows you to blend wet and dry signals like every other plugin. However, what sets Gold Clip apart is the option to unlink dry and wet signals and blend them separately by clicking on the 🔗 symbol.

For instance, you could put the dry signal at full volume and blend in the clipped signal in from the bottom up! Then adjust the Output Trim to maintain perceived loudness.
In a previous video, I talked about how Gold processing relies on the input being as close to the clip point as possible in order to get the most out of it. In that example, we used the linked I/O Trims to get the signal to the clip point, but now let's use the clipper ceiling.
Two Ways to Clip & Process
1. Link the I/O Trims with the 🔗 above the waveform display
2. Push the Input Trim up so you get exactly 0.0dB of clipping.
3. Take note of the Input Trim level required to get there.
4. Reset the Input Trim to 0dB by option-clicking the fader.
5. Pull the Clipper Ceiling down by the same dB value that you used on the input fader.
You’ve just achieved the same internal gain staging in two different ways. Linking the I/O Trim lets you adjust the signal by ±12 dB, while the Clipper Ceiling allows Clipping, Gold, and Alchemy processing on signals as low as -36 dBFS.
When you use both the Clipper Ceiling and linked I/O Trims together, you can process tracks with levels as low as -48 dBFS, all while maintaining perceived volume.
I generally use linked I/O Trims when Gold Clip is inserted on the master fader, and the Clipper Ceiling control when it is inserted on instrument tracks and buses.
Check out this video to hear this in action.
Give it a try and hit reply to let me know what you think. Or, tag @SchwabeDigital in an instagram story and show us how you are using it. We'll repost.
Next time, we'll dig into Gold Processing and unpack how it works.
Be well,
Ryan Schwabe
Grammy-nominated and multi-platinum mixing & mastering engineer
Founder of Schwabe Digital
p.s. Subscribe below for updates on Schwabe Digital Plugins.
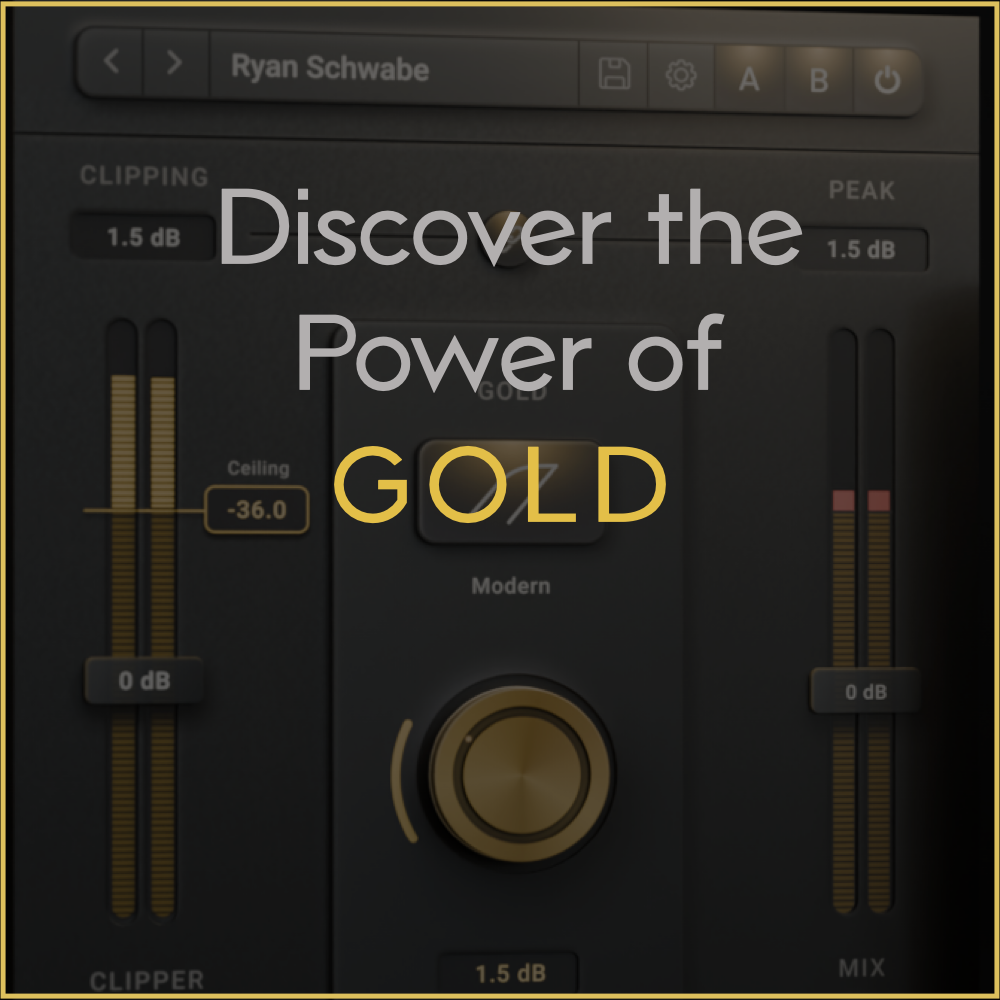
04) Discover the Power of GOLD
The namesake of GOLD CLIP, this feature is fundamentally different than a traditional compressor. Instead of an attack and release time, Gold performs a sample-by-sample analysis of the input and applies a non-linear gain to the signal.
Gold, the namesake feature of GOLD CLIP, redefines compression. Unlike traditional compressors that rely on attack and release times, Gold performs a sample-by-sample analysis of your audio, applying non-linear gain to enhance perceived loudness. Peaks and transients remain untouched, while low-level material and sustain are brought forward, adding depth and presence.
This instantaneous compression works like tape, delivering natural, smooth loudness—without the artifacts caused by attack and release stages. The result? Transients stay fast, clean, and natural, while your mix gains a unique sense of sonic "inflation," making sounds feel bigger and fuller.
When used on your master fader, Gold’s clean approach to loudness can transform how you compress instruments and buses feeding into GOLD CLIP. It’s more than just a tool—it’s a whole new way to shape your sound.
Two Types of GOLD
Modern: Gentle & Transparent Loudness Processing
The Modern setting emulates the soft-knee loudness processing of a renowned mastering converter from 2022, offering a refined, transparent approach to loudness enhancement. Designed for subtlety, Modern provides a gentler and more forgiving form of compression, making it ideal for maintaining clarity and preserving natural dynamics in your mix.
Modern applies less gain than Classic, using a shorter knee to achieve smooth loudness processing. With a maximum of 2.5 dB of gain compared to Classic’s 6 dB, Modern excels at adding just enough loudness without introducing noticeable harmonic coloration. This makes it a perfect choice for clean, polished results, whether on individual tracks or your master bus.
2.5dB of Modern GOLD

Classic: Soft-Knee Saturation with a Punch
Classic emulates the soft-knee loudness processing of a well-loved mastering converter from the late 2000s. While it features a softer knee for amplitude saturation, it delivers a more aggressive sound than Modern and generates greater harmonic excitement at higher settings.
What sets Classic apart is its dynamic knee behavior. The knee’s shape varies based on the amount of Gold applied, starting as low as 12 dB below the clip point when set to 6 dB. This unique design allows for precise control and tonal shaping, making Classic a versatile choice for enhancing loudness with character.
6dB of Classic GOLD

Which to choose?
When mastering, I recommend starting with Modern Gold processing. With its maximum gain of 2.5 dB, it delivers a clean, transparent sound, ideal for dense content like full mixes.
On the master fader, Gold Clip can be placed either first in the chain or just before your final limiter. Placing it first allows you to shape dynamics early, while positioning it just before the limiter ensures maximum loudness and smoothness at the final stage.
For more aggressive processing, Classic Gold is the better option. Its longer knee and higher gain make it perfect for signals with a wider dynamic range, such as drum buses, 808s, effects returns, or vocals.
Choose based on the content and the result you're aiming for—both are powerful tools in the right context.
What is Gold Unity?

Gold Unity is straightforward. If you apply 6 dB of nonlinear gain with Gold, Unity automatically reduces the output by 6 dB of linear gain after Gold. This maintains perceived volume while reducing peaks, allowing you to focus on the compression effects of Gold without being misled by an increase in loudness.

Just remember that the more aggressive clipping you do, the less clean gold processing will sound. When using Gold for loudness, I like to keep my clipping to a minimum.
Here's a quick video example of this entire setup.
Give it a try and hit reply to let me know what you think. Or, tag @SchwabeDigital in an instagram story and show us how you are using it. We'll repost.
In the next post, we'll talk about the companion to Gold, called Alchemy.
Be well,
Ryan Schwabe
Grammy-nominated and multi-platinum mixing & mastering engineer
Founder of Schwabe Digital
p.s. Subscribe below for updates on Schwabe Digital Plugins.
05) Alchemy 2: Smooth, Tape-Inspired Sound
In medieval times, people believed in "alchemy": a fictional process that could supposedly transform mundane materials into precious gold. Sadly, it doesn't exist...
But in GOLD CLIP, it does :)
In medieval times, people believed in "alchemy": a fictional process that could supposedly transform mundane materials into precious gold. Sadly, it doesn't exist...
But in GOLD CLIP, it does :)
🔹 ALCHEMY 2 🔹: Smoother, Richer, More Musical
Alchemy 2 is a peak processor that softens mid-to-high frequencies, reducing harshness and unwanted clipping artifacts. It brings a smooth, tape-like quality to your mix, creating a cohesive and polished sound, especially as signals approach the clip point.
As audio gets louder, Alchemy 2 gently shapes peaks and tames aggressive frequencies without dulling the mix. It’s perfect for maintaining clarity and adding warmth while preserving the natural energy of your tracks.
The below plot shows the EQ curve of Alchemy 2:

When Alchemy is set to 2 dB, the EQ curve above reacts to the clipped signal with the transfer function below.

When To Use ALCHEMY
Much like tape, Alchemy applies high-frequency compression instantaneously, without attack or release artifacts. This makes it ideal for taming harshness in a natural and transparent way.
Alchemy can be used as a subtle de-esser or high-frequency softener. I usually start with Alchemy at 0 dB, then set the amount of clipping I need. From there, I turn up Alchemy to pull back harsh mid-range and high frequencies, creating a smoother, more polished sound.
If you’re using a limiter to add gain after Gold Clip, Alchemy can also enhance perceived loudness. It increases the impact of kick drums and other low-frequency transients as they ascend into the clipper, giving your mix more weight and punch.
Things to Keep In Mind
Alchemy processing is tied to the signal’s proximity to the clip point, similar to Gold processing. In most popular music, the loudest signal is typically the kick drum and/or bass, often around 80 Hz.
As the low-end frequencies from the kick or bass approach the clip point, Alchemy begins reducing the mid and high frequencies. This dynamic adjustment helps maintain balance and smoothness in the mix.
For example, if a clap and a kick hit simultaneously, the clap might appear slightly quieter than the kick. That’s because Alchemy is pulling down the mid-range and highs as the combined signal nears 0.0 dBFS, ensuring a cleaner and more cohesive result.
Check Out this video on the New Alchemy 2!
Give Alchemy 2 a try next time you use Gold Clip, and let me know what you think. Tag @SchwabeDigital in an instagram story and show us how you are using it. We'll repost.
In the next post, we'll talk about the three clipping algorithms.
Be well,
Ryan Schwabe
Grammy-nominated and multi-platinum mixing & mastering engineer
Founder of Schwabe Digital
p.s. Subscribe below for updates on Schwabe Digital Plugins.

06) Three Clippers and a Secret Mode
You probably already have seen that GOLD CLIP has three unique clipper algorithms: Modern, Classic, and Hard.
You probably already know that GOLD CLIP PACK includes three unique clipper algorithms: Modern, Classic, and Hard.
Each has its own distinct sound, and I highly recommend experimenting with all three to find the perfect fit for your music.
But did you know there’s a hidden fourth setting? 🤯 Keep reading, and I’ll reveal the secret behind this powerful feature!
Exploring GOLD CLIP PACK's Clipper Modes
Classic is the default setting and an excellent all-around choice. Inspired by a legendary hardware mastering device, it features a medium knee that works well on nearly any material. It’s my go-to starting point for most mixes.
Modern emulates another iconic hardware device with a softer knee, carefully tuned to match its dynamic response. This mode delivers a more lively sound, particularly accentuating low-frequency transients for a punchy, dynamic feel.
Hard offers the cleanest option, preserving the integrity of the signal below the clip point. For more delicate styles of music, I like to push the input trim so the track sits about half a dB below the clip point. From there, I use Gold for loudness and Alchemy to shape the tone, without introducing any clipping.
Each mode has its own character—experiment to find the perfect fit for your sound!
The Secret Fourth Clean Setting
During development, I insisted on a "clipper off" mode, despite some pushback from my developer.
With the clipper completely disabled, Gold and Alchemy can operate in their cleanest form, free from the harmonic effects of clipping. This setting allows for an ultra-transparent approach, perfect for genres that demand clarity and subtlety.
If you're careful with your gain staging, this mode can work wonders. I’ve used it on modern classical records, folk, ambient, and even some RnB and rap tracks. It’s a step beyond the Hard setting and incredibly powerful when used correctly.
However, be mindful—ensure your signal stays below the clip point. Pushing too hard in this mode can result in unpleasant distortion. With careful use, this hidden gem might become your go-to for pristine audio processing.
How to Unlock the Fourth Clean Setting
Want to access the secret "clipper off" mode? It’s easy: command-click on the Clipper button. This bypasses the clipper and turns the ceiling needle grey, signaling that the clipper is disengaged.
From there, use the linked input/output trim to get your signal as close to 0.0 dBFS as possible. Then, apply Gold and Alchemy processing.
And just like that, you’re using Gold Clip in the cleanest way possible. Perfect for when transparency is your top priority!
Want to Try a Secret-Secret Wild and Aggressive Mode?
Here’s one for the adventurous: turn off the clippers, select Classic GOLD, and crank the input trim into overdrive. What happens next? Some wild, weird, and downright aggressive overloading. This mode takes Gold Clip into uncharted territory—perfect for experimental sounds and pushing boundaries.
Give it a try, and let me know what you think. Tag @SchwabeDigital in an instagram story and show us how you are using Gold Clip. We'll repost.
In the next post, we will talk about what makes the Clip Clock so useful.
Be well,
Ryan Schwabe
Grammy-nominated and multi-platinum mixing & mastering engineer
Founder of Schwabe Digital
p.s. Subscribe below for updates on Schwabe Digital Plugins.

07) Monitor Your Clipping with Clip Clock
Clip Clock is very simple idea, but a powerful tool that is unique to Gold Clip. It does two things.
Clip Clock is a unique feature in Gold Clip, designed to give you precise control over your clipping and Gold processing. It offers two essential functions:
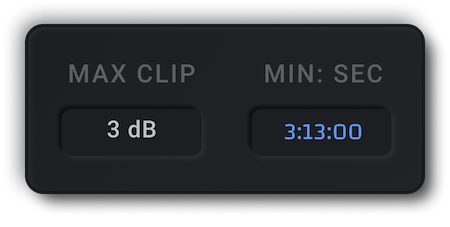
Max Clipping Amount
Clip Clock monitors the maximum amount of clipping in your track. If you clip by 5 dB and that’s more than you intended, the MAX CLIP field will clearly display it, allowing you to make adjustments as needed.
Max Clipping Location
Clip Clock records the exact MIN:SEC where the maximum clipping occurred, making it easy to pinpoint the location. Even if the plugin window is closed, Clip Clock continues to monitor your clipping. To evaluate where your clipper is working the hardest, navigate to the MIN:SEC in your song, take a listen, and decide if the clipping is too much or just right.
You can reset MAX CLIP or MIN:SEC anytime by double-clicking on them.
This tool is simple yet invaluable for refining your clipping and Gold processing. Remember: less clipping leads to cleaner Gold processing, as the two are inversely related. That’s why Clip Clock exists—to help you fine-tune your clipping and maximize the impact of Gold.
Hit reply and let me know if you are using Clip Clock. Or tag @SchwabeDigital in an instagram story and we'll repost.
Happy record making~
Ryan Schwabe
Grammy-nominated and platinum mixing & mastering engineer

08) Refining High Frequencies with Box Tone
Box Tone is one of the more subtle processors on GOLD CLIP, but I often find it helpful when I want to smooth out the top end of digital recordings. In effect, Box Tone is a hyper-sonic low-pass filter that cleans up some of the digital ugliness on the very top of a mix.
Box Tone is one of the more subtle processors in GOLD CLIP, but I often find it invaluable for smoothing out the top end of digital recordings. Think of it as a hyper-sonic low-pass filter that helps clean up some of the digital harshness in the very highest frequencies of a mix.
While subtle, Box Tone adds a slight contour to the highs, creating a smoother, more cohesive top end—especially when using the Modern setting.
Here’s a look at what Box Tone is doing:
FLAT: The True Bypass Option
When set to FLAT, Box Tone is completely bypassed. There’s no contour or hyper-sonic low-pass filtering applied—it remains true to the input signal all the way up to 40 kHz in a 96 kHz host sample rate session. This setting ensures a completely neutral pass-through, perfect for when you want an unaltered, transparent output.

CLASSIC: Smooth Air-Band Contour
The CLASSIC setting adds a gentle air-band contour around 20 kHz, slightly softening the top end in your mix. It also applies a hyper-sonic low-pass filter, removing unwanted frequencies beyond our hearing range, between 20 kHz and 40 kHz.
This setting is perfect for subtly shaping the high end while keeping the extreme top end clean and true to input.

MODERN: High-End Shaping
The MODERN setting introduces a more aggressive contour than CLASSIC, with subtle cuts around 3 kHz and 8 kHz to reduce harshness and improve smoothness. It also slightly reduces the air-band around 20 kHz by 0.3 dB, adding a refined touch to the top end.
Like CLASSIC, it features a hyper-sonic low-pass filter to remove unwanted frequencies between 20 kHz and 40 kHz, but with a more assertive tonal shaping that’s ideal for modern productions requiring a tighter, smoother high-frequency response.

Box Tone is a high-precision filter inspired by the mid- and high-frequency contours of modern and classic converters. As you’d expect, converters are designed to be as flat and balanced as possible, so these effects are intentionally subtle.
Box Tone captures this nuanced behavior, providing a gentle and refined way to shape the top end of your mix while preserving its natural character.
Hit reply and let me know how you are using Box Tone in your mixes and masters. Or, tag @SchwabeDigital in an instagram story and show us how you are using Gold Clip. We'll repost.
Be well,
Ryan Schwabe
p.s. Subscribe below for updates on Schwabe Digital Plugins.