
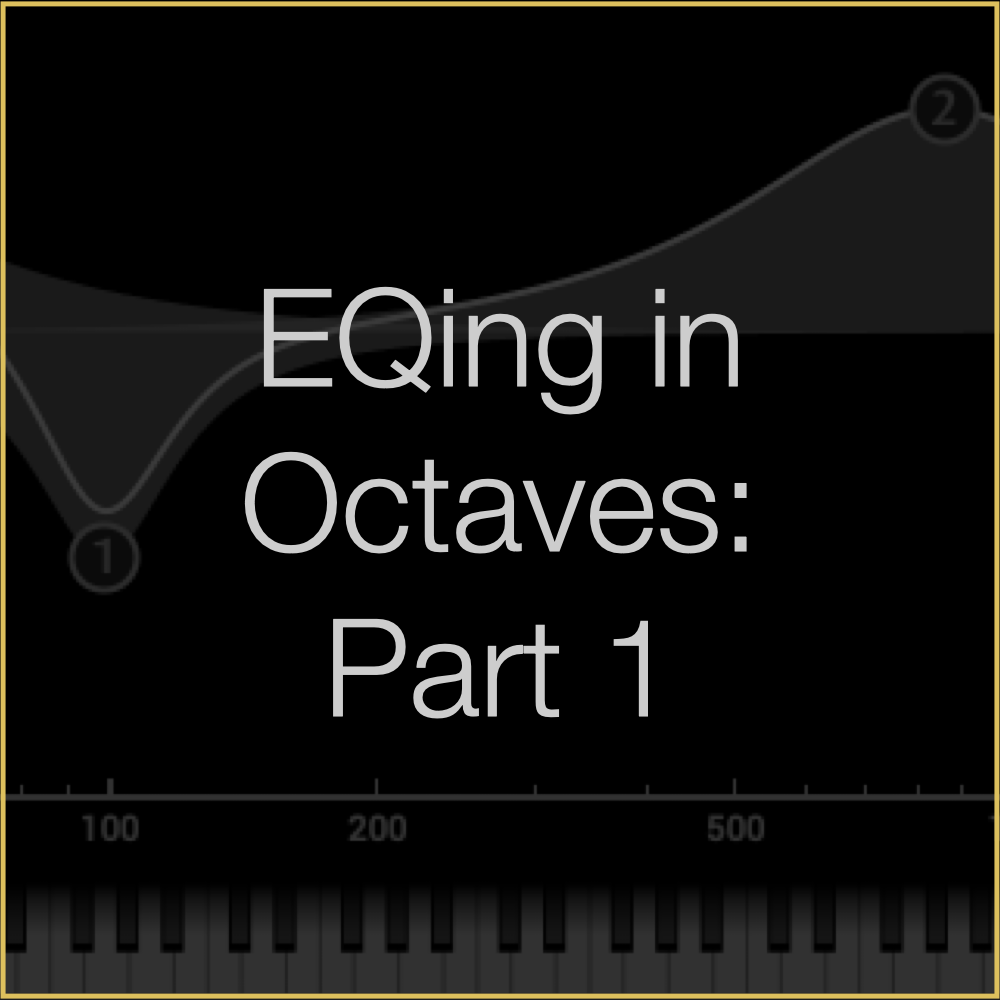
EQing in Octaves: Part 1
This is the first of a three-part email series designed to simplify your approach to EQ and help you make better mixing decisions.
We measure sound frequencies on a logarithmic scale in Hertz (Hz), or cycles per second. While essential for describing audio, this unit can feel abstract and disconnected to how we think about and create music. For example, a frequency of 100 Hz means a sound wave vibrates or oscillates for one full cycle at 100 times per second.
Musical notes are sound waves oscillating at specific cycles per second, and an octave is simply doubling or halving those oscillations to move up or down the scale.
Here’s where it gets tricky: there are only 12 notes in an octave, regardless of whether you're looking at 30–60 Hz or 3,000–6,000 Hz. This is because octaves follow a logarithmic scale—frequencies double with each octave (e.g., 20 Hz, 40 Hz, 80 Hz, 160 Hz, and so on)
This doubling can seem daunting, especially on an EQ graph, but understanding it can simplify how you approach EQing and balancing a mix.
Simplifying EQ: From Hertz to Octaves
The human ear picks up frequencies from 20 Hz to 20,000 Hz—a pretty wide range. But sound doesn’t stop at the limits of our hearing range. There are sound waves below what we can hear (infrasonic) and above it (ultrasonic). However, these low frequencies are usually filtered out by DC filters, and high frequencies by anti-aliasing filters, depending on the sample rate, of course.
Focusing on what we can hear, if we think in terms of musical octaves instead of raw numbers, that big range of 20 Hz to 20,000 Hz boils down to just under 10 octaves. That’s 10 manageable “bands” to work with, instead of 20,000 individual frequencies. Much easier to wrap your head around, right? Those 10 octaves can be broken down like this...

The 'middle' frequency of our hearing range, numerically speaking, is around 640 Hz—an unexpected midpoint, but it makes sense when we think in terms of octaves. There are about 5 octaves below 640 Hz (down to 20 Hz) and 5 above (up to 20 kHz), meaning our hearing is split evenly in terms of octaves.
Relating EQ to musical octaves makes frequency adjustments feel more intuitive and grounded in how we naturally think about music. When EQing, I typically cut with narrower bands, often about an octave wide, to address specific issues. On the other hand, when boosting, I prefer using wider bells, spanning two or more octaves, to shape the tone more musically.
However, not all octaves are perceived equally. Our ears are most sensitive to the 1–5 kHz range (roughly octaves 6–8 on the frequency spectrum), where our hearing is naturally tuned to detect detail—an evolutionary trait that likely developed for survival. This range encompasses the majority of human speech, and our sensitivity to subtle nuances within it has been essential for communication and fostering social bonds throughout history.
That may be a bit too much evolutionary context for this conversation about EQing your mix, but this 2.5-octave range demands our attention. Our ears are particularly attuned to this area and are highly sensitive to imbalance, excessive transients, and shifts in loudness. Getting it right can dramatically affect how the listener perceives loudness, balance, and presence in your mix.
Thinking in octaves can transform your approach to EQ, shifting it from a technical grind to a more natural, gestural, and musical process. By mastering the fundamentals of EQ, compression, and saturation, you’ll discover that many “problem-solving” tools—like resonance suppressors (e.g., Soothe 2)—are often used to address balance issues that could be resolved with better EQ techniques. While these tools have their place in specific scenarios, they are frequently overused in modern music production.
By understanding how octaves relate to the music we create, you can map your EQ decisions more effectively to the issues you hear in a mix. This empowers you to make more informed choices and reduces reliance on complex modern resonance tools, which can inadvertently introduce unwanted artifacts that often go unnoticed.
In Part 2, we’ll dive deeper into the individual frequency bands. We’ll talk about common issues, how to tackle them, and how to keep your mixes musical and balanced.
Have questions? Just hit reply, and we’ll get back to you. You can also tag us on instagram—we’re always happy to connect!
Be well,
Ryan Schwabe
Grammy-nominated and multi-platinum mixing & mastering engineer
Founder of Schwabe Digital


EQing in Octaves: Part 2
Last week, we explored how thinking in octaves can simplify your EQ process, making it feel more musical and intuitive. Today, we’ll take that concept further by dividing the 10 octaves into 5 key frequency bands—low, low-mids, mids, high-mids, and highs—and discussing how each band shapes our perception of sound. This week, we’ll focus on the first three bands and cover the remaining ones next week. Conveniently, each of the 5 bands spans roughly two octaves. Let’s explore them.
Last week, we explored how thinking in octaves can simplify your EQ process, making it feel more musical and intuitive. Today, we’ll take that concept further by dividing the 10 octaves into 5 key frequency bands—low, low-mids, mids, high-mids, and highs—and discussing how each band shapes our perception of sound. This week, we’ll focus on the first three bands and cover the remaining ones next week. Conveniently, each of the 5 bands spans roughly two octaves. Let’s explore them.
Lows: Octaves 1 & 2 (20–100 Hz)

As mentioned, the lowest frequency we can hear is 20 Hz. The lowest musical note we can hear is a low E, one octave below the E on an electric bass, at 20.6 Hz. This means the two low-frequency octaves range from 20 Hz to about 80 Hz. However, in practice, each band spans roughly 2.5 octaves, with some overlap between what is considered a low band and a low-mid band, or a high-mid band and a high band. In practice, the low band is commonly defined as 20 Hz to 100 Hz.
Let’s take a closer look at the low band and its role in most popular music. As you can imagine, in rhythm-section-oriented popular music, the kick and bass dominate the fundamentals of this band. I like to think of it as the foundation on which a balanced mix is built.
One approach I sometimes use is to solo the kick, bass, and vocal to evaluate how the power of the low end balances with the energy of the vocal. It’s a quick and effective way to judge the level relationship between two fundamental parts of modern music: the power of the bass and the diction as well as the message of the vocal. This method serves as a great temperature gauge, helping you reassess vocal effects, the relationship between low-frequency instruments, and how much space is left for the rest of the instruments to fit cohesively into the mix. While I am often skeptical of making any major decisions about a mix while in solo, listening to an acapella and bass has provided me with useful perspective.
The graph below shows the average spectral balance of #1 hits in the US and UK from 1950 to 2010 (AES, 2013).

In most popular music mixes, low frequencies dominate the spectrum due to the interaction between the bass and kick. The frequency balance in these #1 hits is anchored by energy centered around 80 Hz, with a sharp roll-off below 60 Hz. Higher in the spectrum, the balance follows a linearly decaying slope of approximately 5 dB per octave between 100 Hz and 4 kHz, with progressively steeper attenuation at higher frequencies. The balanced power of the low frequencies plays a crucial role in your limiter's performance, the perceived loudness of your track, and the dynamic response of your mix on consumer playback systems.

Many streaming services use K-weighted filtering (part of LUFS measurements) to mimic how our ears perceive loudness, focusing on frequencies where human hearing is most sensitive. This filtering de-emphasizes deep sub-bass frequencies, allowing producers to push sub-bass louder without significantly increasing the impact of volume normalization on a track’s loudness on streaming platforms. However, excessive deep low-end can compromise a limiter's ability to make a master sound loud and present before loudness normalization, making it a delicate balancing act to set the right amount of low-end energy.
Key Tips
Focus on dialing in the relationship between your kick and bass within the first and second octaves. Typically, the kick will dominate one octave while the bass occupies the other. Which octave each instrument primarily occupies depends on the production style and the song itself.
Adjust the low end in relation to the rest of the mix by using a low-frequency shelf that evenly boosts or cuts both low-frequency octaves.
Cut sub-bass frequencies below 25 Hz to clear up your mix and increase headroom. I prefer using low-frequency shelves over high-pass filters (HPFs) because they are more transparent and avoid phase shifts or added harmonics. Even though K-weighted filtering discounts low frequencies, these still consume the most energy in your mix and can cause unpleasant artifacts in your limiter, especially in over-compressed masters.
For a deeper dive, check out my low-end balancing blog post linked below. In that article, I outline a simple three-band strategy for managing low frequencies in your mix.
Low-Mids: Octaves 3 and 4 (100–400 Hz)

The low-mids are where the fundamentals of chords and melodies, the body of drums, and the chest of a vocal performance reside. Since the fundamentals of most instruments and vocals often live here, it’s easy for frequencies in this range to pile up. Be cautious, though—cutting too much in the low-mids can make a mix feel overly scooped and lacking in body or wholeness.
When I refer to the 'fundamental' of an instrument, I’m talking about the primary notes that make up a chord. For example, on a piano, A440 (440 Hz) is the fundamental frequency of the root note in an A minor chord. The minor third, C, is at 523.25 Hz, and the perfect fifth, E, is at 659.26 Hz. When you examine this chord on a spectrogram, you’ll see that the fundamental frequencies dominate the energy. In contrast, the subharmonics below and the harmonics above—which shape the timbre of the sound—contribute significantly less energy.

A common production mistake is stacking too many instruments in the same frequency range. When chords and instruments with fundamentals in the same range are layered, it can cause a significant buildup of density and loudness in the low-mids relative to the rest of the mix. This is why songs with fewer layers of instruments often result in a louder and clearer final master. With less low-mid frequency duplication and buildup, the energy of the production feels more balanced and open.
This is also why many producers and mix engineers embrace the concept of “production through reduction.” Simplifying and minimizing the arrangement of instruments occupying the fundamental frequencies allows each element to breathe, aligning with the human ear's preference for fewer competing elements at once.
Instead of boosting the top end to make an instrument sound brighter, try cutting in this range and raising the instrument’s overall volume. This approach preserves the integrity of the high frequencies, avoiding any potential artifacts from processing, while simultaneously reducing weight in the low mids. With this method, you’ll often achieve a cleaner and more natural result.
Exploring Alternative EQ Approaches
Similarly, I’ve experimented with working in powers of 10 instead of the traditional octave-based system we are currently discussing. While octaves function by doubling or halving a frequency, this approach involves making strategic adjustments at frequencies related by factors of 10.
For example:
To make 2 kHz feel more energetic, cut at 200 Hz and raise the volume.
To make a mix feel warmer around 400 Hz, use a wide bell cut at 4 kHz and raise the volume.
This approach is effective because it indirectly alters the balance and perceived energy of a target frequency without applying any processing to it.
Mids: Octaves 5 and 6 (400 Hz – 1.5 kHz)

The midrange, traditionally spanning 500 Hz to 2 kHz, is where the core frequencies of most instruments converge, making it the area where EQ adjustments have the greatest impact on an instrument's size and presence. The upper midrange, aligned with the Fletcher-Munson curve, corresponds to the frequencies where our ears are most sensitive—earning it the reputation as the 'size control' for a mix.
Frequency masking often occurs in this range, and pushing the mids too far forward can make instruments feel overly aggressive or 'shouty.' Additionally, overemphasizing the mids can lead to issues with loudness normalization, causing your mix to sound smaller compared to others.
For example, a gentle, wide boost around 1 kHz can help a vocal stand out, while cutting a competing instrument in the same range can unmask the vocal. If you push this range beyond a natural balance, it will cause loudness measurements to register the mix as louder, resulting in lower playback levels.
Practical Application
For Larger Vocals: Boost with a wide bell around 1kHz or 1.5kHz. Think of this as a size knob for anything in your mix. If you want something to feel bigger (and it’s not overly compressed), boost here, and it’ll grow.
For mastering, use mid-side EQ to push the vocal forward or pull it back. Solo the mid channel and sweep through the frequencies to identify the spot where the vocal stands out most relative to the other instruments. This range might not always be where you'd expect. Focus not on the vocal's fundamental frequency but on the range where it feels most separated or independent from the other sounds in the arrangement. Once you find it, adjust the gain in that range to subtly change the vocal's placement in the mix.
The lows, low-mids, and mids form the backbone of your mix, shaping its depth and power, warmth, and overall presence.
Next post, we’ll dive into the high-mids and highs—where clarity and energy live. These ranges can bring your mix to life or make it harsh if not handled carefully. See you then!
Have questions? Just hit reply, and we’ll get back to you. You can also tag us on instagram—we’re always happy to connect!
Be well,
Ryan Schwabe
Grammy-nominated and multi-platinum mixing & mastering engineer
Founder of Schwabe Digital

EQing in Octaves: Part 3
Last week, we explored the lows and mids—the fundamental frequencies that give your mix its weight, warmth, and power. Today, we'll focus on the high-mids and highs, where brightness and articulation live. These frequencies are crucial for bringing excitement and clarity to your mix, but they require precise placement to avoid harshness. Let's talk about how to craft a top end that's clear, balanced, and musical.
Last week, we explored the lows and mids—the fundamental frequencies that give your mix its weight, warmth, and power. Today, we'll focus on the high-mids and highs, where brightness and articulation live. These frequencies are crucial for bringing excitement and clarity to your mix, but they require precise placement to avoid harshness. Let's talk about how to craft a top end that's clear, balanced, and musical.
High-Mids: Octaves 7 and 8 (1.5–6 kHz)

Our ears are remarkably sensitive to frequencies in the high-mids—a trait rooted in evolution. This range, where the human voice naturally resonates, is critical for speech intelligibility and the brightness we associate with clarity in music. Our ears are finely tuned to pick up the most detail in this range—not by chance, but because it’s how we’ve evolved to communicate and survive in groups.
If your mix sounds harsh, piercing, or fatiguing, the high-mids between 2 kHz and 8 kHz are often to blame. Elements in this range can easily turn an engaging mix into an exhausting one if they’re too prominent.
For example, an overly pokey attack time on a compressor applied to an instrument in this range can push it too far forward, making it irritating. On the other hand, overusing a resonant suppressor like Soothe2 and stripping away too much transient detail can leave your mix sounding distant, dull and lifeless.
It’s not just the loudness in this frequency range that matters—it’s also the shape and intensity of the transients. Psychoacoustically, our ear associates transients in this range with something near or approaching—something potentially dangerous—so it demands our attention. A lack of transients, on the other hand, signals distance.
This response is hardwired into us—an instinctive reaction shaped by evolution to help us survive and detect threats. These same principles apply to mix depth. Reducing mids and transients creates a sense of distance and lowers attention, while boosting them brings elements forward, increasing perceived closeness and focus.
Key Tips:
If your mix feels harsh or fatiguing, check the high-mids (2–8 kHz). Use subtle EQ cuts to tame resonances without killing clarity. Balance is the goal—not dullness. Avoid excessive tight cuts to prevent phase smearing.
The transient shape in this range influences both the perceived loudness and the depth of a sound in the mix, determining whether it sits forward or further back. Sudden transient bursts push sounds forward and draw our attention, but they can also cause ear fatigue. Excessive transient control, on the other hand, pushes sounds backward and can make a mix feel distant and lifeless. These are the extremes—explore them, but don’t ignore the middle ground.
How you shape transients with compression, saturation, and distortion is crucial for defining both loudness and front-to-back placement of instruments in the mix.
Highs: Octaves 9 and 10 (6–20 kHz)

The highest octave in a mix is where air and overtones live. It’s not about distinct musical notes but rather the harmonic definition that gives sounds their sense of openness and space. This is where cymbals shimmer, vocal articulations like 'esses' and 'Ts' cut through, and instrument textures come alive.
Personally, I find that frequencies above 17 kHz often sound harsh in digital recordings—maybe a hot take, but it’s been a consistent observation. For example, I frequently use a low-pass filter on vocals between 13–18 kHz to tame distracting or overly bright frequencies. The SSL 9000 LPF is great for this.
However, if you ask a seasoned engineer, they might disagree because they historically used tubes and tape, which naturally softened and compressed these frequencies.
Quick bursts of energy in the highest octave can be especially fatiguing. Our ears enjoy brightness but recoil from excessive dynamics and resonance in the high-end. It’s not just about volume—it’s about the shape of those frequencies. Sudden boosts in the lows, like sub-bass, feel powerful and satisfying. But sudden spikes in the highs? They pierce our ears, triggering discomfort and alarm.
Managing the dynamics of this range is key to creating a mix that’s bright and open without being harsh. When balanced correctly, the highest octave can make a mix feel expansive and alive, as if it’s breathing—but overdo it, and the mix can quickly become brittle or fatiguing.
Key Tips
Sudden bursts in the highs—like an uncontrolled 'ess' or harsh cymbal—can be piercing. Start by adjusting their intensity with shelves or a low-pass filter. If the top end is too dynamic, use de-essers, tape emulations, or dynamic EQ to tame the peaks, adjusting attack time carefully. Don’t shave the transients off—right-size them for the mix. Our next plugin HiFAL is built for this, giving you effortless control over high-frequency transients.
Selective boosts around 8 kHz help vocals and lead instruments pop forward in the mix. This frequency adds presence while remaining musically connected, unlike the more airy "sizzle" of 12 kHz and above. Keep the boost subtle to avoid harshness or excessive brightness. While your instinct might be to make things brighter, sometimes reducing density in the low-mids and dynamically controlling the highs is a more effective way to achieve clarity and balance. Again, the transient shape and dynamics are as important as the level.
Making EQ Decisions That Matter
Thinking in octaves can simplify your EQ workflow, making it feel more musical and less like a technical chore. Instead of getting bogged down in the specifics of thousands of Hertz, simplify your approach with 10 octaves: use wide bells (1 octave or more) to boost and add character, and narrow bells (1 octave or slightly less) to clean up problem frequencies.
In an era of tools like Pro-Q4 and Soothe2, sleek interfaces can lead us to overthink and fix problems that don’t need fixing. While these tools are valuable, mixing and mastering are often simpler than we make them out to be. If your EQ moves start resembling a science experiment, you’ve likely gone too far.
Keep it simple—think in octaves and approach EQ with intent. This mindset aligns technical choices with musical goals, making EQ decisions feel more gestural and intuitive. Also, remember that transient intensity and shape play a major role in how we perceive harshness.
Thats it for now. In the next email, I'll discuss how tweaking our listening environment to balance perceptual bias can help us create mixes that translate across different playback systems.
Have questions? Just hit reply, and we’ll get back to you. You can also tag us on instagram—we’re always happy to connect!
Be well,
Ryan Schwabe
Grammy-nominated and multi-platinum mixing & mastering engineer
Founder of Schwabe Digital

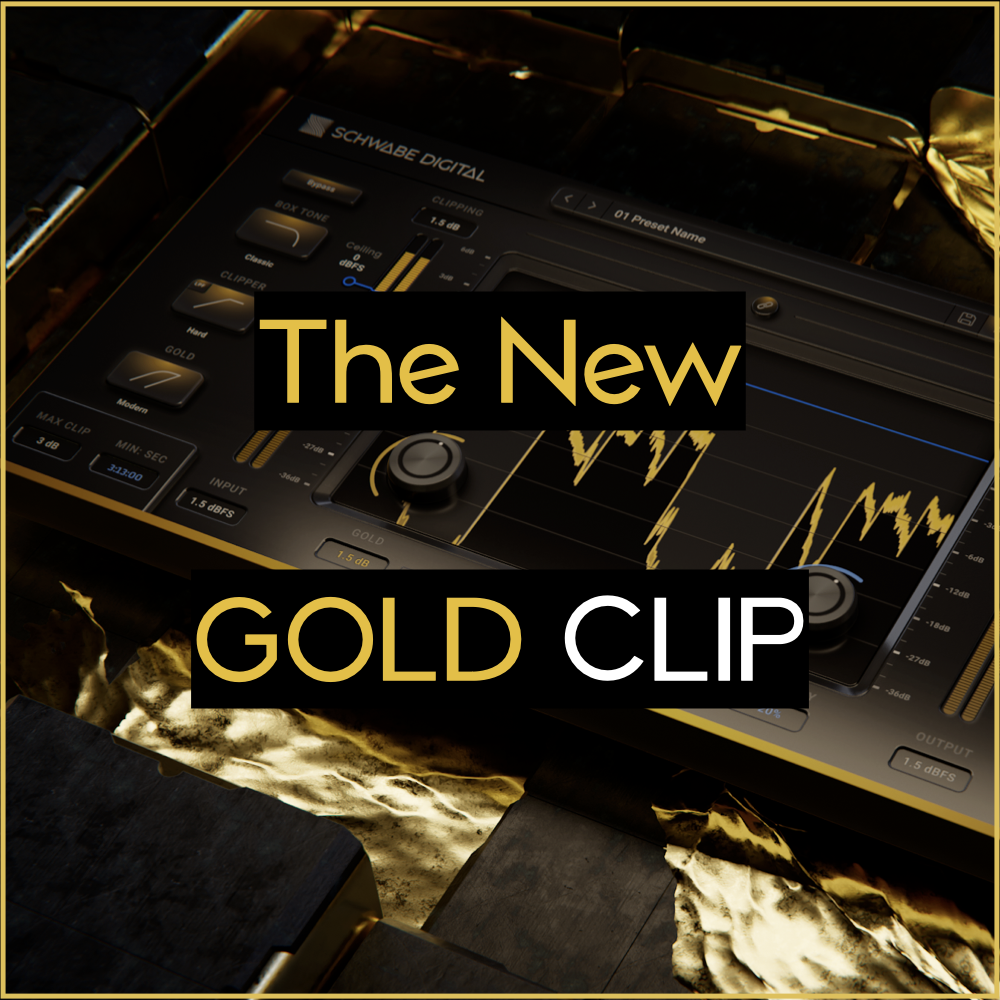
Reviving Loud & Limited Pre-Masters with GOLD CLIP
As a mastering engineer, I’m often handed mixes that are already limited or clipped. These loud, finalized mixes can be tricky to work with because there’s often very little headroom or transient detail left. What I do as a mastering engineer involves envelope or dynamic shaping just as much as balancing, sweetening, and preparing a mix for distribution.
As a mastering engineer, I’m often handed mixes (pre-masters) that are already limited or clipped. These finalized mixes can be challenging to work with because they are already heavily limited, leaving little transient detail. As a mastering engineer, my work often includes envelope and dynamic shaping just as much as balancing, sweetening, and readying a song for distribution.
The Challenge of Loud Mixes
When I receive loud mixes, my ability to shape the envelope is reduced because the transients have been chopped away beforehand. While I usually request a separate, lower-level pre-master for more flexibility in handling transients, some mixing engineers prefer to stick with their loud mixes—and that’s perfectly fine.
The question is: what purpose does a clipper serve in a mix that’s already limited and clipped?
You might think a clipper has no role here. After all, if the transients are already clipped or limited, what more could a clipper possibly do? The answer lies in what makes Gold Clip so much more than just a clipper.
Gold Clip: Not Just a Clipper
Gold Clip isn’t just a traditional clipper—it’s a versatile tool equipped with internal processors specifically designed to refine limited or clipped signals, making it perfect for handling loud pre-masters. Every element in Gold Clip is bypass-able, allowing you to adapt it to the needs of your mix. For tracks that are already clipped or limited, you can turn off the clipping and saturation components while leaving on Box Tone and Alchemy. These processors can then work independently to smooth and soften clipping artifacts.
In my latest YouTube video, I explain how I use Box Tone and Alchemy to smooth and refine heavily limited or clipped mixes.
What You’ll Learn in the Video
🎛️ How Modern Box Tone smooths the top end, filters out harsh ultrasonic frequencies, and refines loud mixes.
⚙️ How Alchemy dynamically softens harsh peaks by emulating high-frequency compression, but without relying on traditional attack and release times. Instead, it behaves more like the natural smoothing effect of tape magnetization.
💡 Why Gold Clip’s bypass-able design makes it a versatile mastering tool, allowing you to use its processors as standalone tools for smoothing clipped or limited pre-masters.
If you’ve ever struggled with mastering loud, limited mixes, this video will give you some new ideas on how Gold Clip might help.
Check it out below:
Have questions? Just hit reply, and we’ll get back to you. You can also tag us on instagram—we’re always happy to connect!
Be well,
Ryan Schwabe
Grammy-nominated and multi-platinum mixing & mastering engineer
Founder of Schwabe Digital

GOLD CLIP PACK is OUT NOW!
We have exciting news for GOLD CLIP users!
To show our appreciation for your support, we're upgrading all Gold Clip users to the new GOLD CLIP PACK!
Gold Clip Pack includes the original Gold Clip that you know and love, plus the FREE add-on plugin, GOLD CLIP track.

We have exciting news for GOLD CLIP users!
To show our appreciation for your support, we're upgrading all Gold Clip users to the new GOLD CLIP PACK!
Gold Clip Pack includes the original Gold Clip that you know and love, plus the FREE add-on plugin, GOLD CLIP track.

PUT SOME GOLD ON IT
We’ve heard from many of you about how you use Gold Clip throughout your mixes, so we created Gold Clip Track to make that process even easier. This simplified version is optimized for track-level use, with a sleek interface that’s easier on your CPU and reduces plugin delay to just 5% of the original Gold Clip.
Now, you can effortlessly insert our renowned clipping and gold saturation on individual tracks in your mix without hesitation. Gold Clip Pack will fit seamlessly into every part of your mixing and mastering workflow, giving your mixes the excitement and loudness they deserve. While the original, more robust version of Gold Clip excels on your master fader, Gold Clip Track is ideal for adding energy and saturation to individual tracks.
At Schwabe Digital, we’re committed to designing tools that enhance the way you work. With Gold Clip Pack, you’ll discover new and inspiring ways to mix and master your music.
If you already own Gold Clip, your Gold Clip Pack license is available in your iLok account right now. Just log in to your iLok app, activate the Gold Clip Pack license, and download Gold Clip Track from your Schwabe Digital Account. Learn more about the Gold Clip Pack upgrade authorization process here.
GOLD CLIP track is FREE for all GOLD CLIP users and is NOT sold separately. Going forward, all new Gold Clip purchases will be sold as the full Gold Clip Pack.
Log in to download GOLD CLIP track today.
Tag me on my @SchwabeDigital instagram and let me know what you think..
Be well,
Ryan Schwabe
Grammy-nominated and multi-platinum mixing & mastering engineer
Founder of Schwabe Digital


The Most Efficient GOLD CLIP Yet!
We’ve got some exciting news to share... We’ve gone through the entire codebase for both the Mac and Windows versions of Gold Clip, hunting for every possible efficiency. We analyzed every element and made improvements to enhance stability and performance—and the results are exceptional!
We’ve got some exciting news to share... We’ve gone through the entire codebase for both the Mac and Windows versions of Gold Clip, hunting for every possible efficiency. We analyzed every element and made improvements to enhance stability and performance—and the results are exceptional!
GOLD CLIP 1.3.2 is officially the most efficient version of Gold Clip ever, while still delivering the EXACT same sound you love.
Log in to download GOLD CLIP 1.3 with Alchemy 2 today.
Tag me on my @SchwabeDigital instagram and let me know what you think..
Be well,
Ryan Schwabe
Grammy-nominated and multi-platinum mixing & mastering engineer
Founder of Schwabe Digital

GOLD CLIP 1.3 with ALCHEMY 2 is Now Available
Alchemy is a high-frequency dynamic processor intended to soften the harshness that clipping can cause. We designed Alchemy when we originally built Gold Clip, and it sounds excellent, but the mastering engineer in me believes that everything in audio can be improved. So, we made Alchemy 2.
Alchemy is a high-frequency dynamic processor intended to soften the harshness that clipping can cause. We designed Alchemy when we originally built Gold Clip, and it sounds excellent, but the mastering engineer in me believes that everything in audio can be improved. So, we made Alchemy 2.
Log in to download GOLD CLIP 1.3 with Alchemy 2 today.
🔹ALCHEMY 2🔹
The idea remains the same, but Alchemy 2 now has a smooth, polished tape-like sound quality. I introduced a smoothing factor, reduced unwanted artifacts, modified the dynamic response, and tweaked the softness of the onset of the effect. I also raised the maximum amount of Alchemy from 1 to 2 dB. I know what some of you are thinking it, but don't worry, Alchemy 2 will recall perfectly in all of your old sessions made with Alchemy 1. We made sure of it.
The below plot shows the EQ curve of Alchemy 2:

When Alchemy is set to 2 dB, the EQ curve above reacts to the clipped signal with the transfer function below.

Alchemy 2 is smooth, polished and tape-like. Give this fascinating new update a try and let me know what you think.
We made some other updates to Gold Clip as well.
NEW CEILING NEEDLE

The new ceiling needle has a bigger numeric display, and is easier to set and read. Additionally, it matches a new Gold Clip companion plugin we are releasing that will be FREE for all Gold Clip owners and Rent-To-Owners. Gold Clip will soon become...

TRIM LINK OFFSET

Trim Link Offset allows you to change the gain relationship between the linked input and output. Set your input and output levels, click the link button and your IO Trim relationship is maintained.
- Shift-Drag either fader to change the offset.
- Shift-Option-Click a fader, and the offset is reset to 0 dB.
- Or, turn linking off, make an adjustment, and then turn linking back on.
It is as easy as that. Trim Link Offset is also available in Orange Clip.
SET YOUR OWN DEFAULT PRESET

Create a preset, click the star and the next time you open Gold Clip it will be your default preset*. Star default preset is also available in Orange Clip.
Tag me on my @SchwabeDigital instagram and let me know what you think..
Be well,
Ryan Schwabe
Grammy-nominated and multi-platinum mixing & mastering engineer
Founder of Schwabe Digital

Orange Clip 1.1 Now Available
We have been working very hard to make major upgrades to both Orange Clip & Gold Clip. Log in to your Schwabe Digital account and download your free Orange Clip update today!
We have been working very hard to make major upgrades to both Orange Clip & Gold Clip. Log in to your Schwabe Digital account and download your free Orange Clip update today! Check out the updates below and let us know what you think. Hit reply or tag us in a story on our instagram.
Anti-Overshoot Oversampling Technology

Gold Clip's unique Anti-Overshoot Oversampling Technology has been added to Orange Clip. While most clippers create overs (output levels above 0.0dBFS) after downsampling, both Orange Clip and Gold Clip keep peaks below 0.0dBFS at all oversampling settings. Clip as much as you want and never go over 0.0 dBFS.
3X More Efficient

Orange Clip's DSP is now 3X more efficient than it was in the previous version. We combed through the engine and implemented every efficiency we could find. But don't worry, even with all those efficiencies, the sound is exactly the same as it was in previous versions. Freely use the new Orange Clip at any sample rate with less impact on your CPU.
Resizable Interface

Orange Clips interface has been redesigned in vectors, enhancing the interface's clarity and allowing it to be resizable. We also improved the frame-rate of the meters & transfer function. In addition, the updated UI has improved stability on Windows and increased efficiency on both Mac and Windows platforms.
Gain Link Offset for I/O Trims & Parallel Mixer

We have introduced Offset Linking to the I/O Trims and Parallel Mixer.
It works like this...
Click the link button, and the link offset is set. If your input is +1dB, and output is 0dB, then a 1dB offset is maintained as you move the faders.
Shift-Drag either fader to change the offset.
Shift-Option-Click a fader, and the offset is reset to 0dB.
Or, turn linking off, make an adjustment, and then turn linking back on.
Be well,
Ryan Schwabe
Grammy-nominated and multi-platinum mixing & mastering engineer
Founder of Schwabe Digital
Designer of Gold Clip & Orange Clip
p.s. If you haven't already, you can buy or rent-to-own ORANGE CLIP right here.

Struggling with Low End in Your Mix? Try This...
You have heard me say this before, but as engineers, we tend to overcomplicate things. Occam's Razor suggests that the simplest solution is always the most effective.
You have heard me say this before, but as engineers, we tend to overcomplicate things. Occam's Razor suggests that the simplest solution is always the most effective. Regardless, when faced with mixing problems, we tend to try the most complicated solutions first. When I taught a mixing class at Drexel University, I would tell my students that they were turning their songs into science projects by using overly complicated solutions for simple problems.
For example, if their low end was not hitting right, they would use side-chain compression, dynamic EQ, multi-band compression, parallel compression, clipping, limiting or some complex combination of them all to control the low end. But those approaches should be your last step, not your first. When trying to shape the tone, weight, size and speed of the low end, this simple EQ technique is an effective first step.
3 Steps to Balancing Low End
1) Set the weight or size of the low end with a low frequency shelf
2) Rebalance the first three octaves of the low end with a bell or shelf
3) Set the speed and depth of the low end with a high-pass filter
1) Setting the Size of the Low End
For most popular music, the frequency with the loudest amplitude in a mix is usually between 80 Hz and 100 Hz.
The below graph shows the average spectral balance of #1 hits in the US & UK from 1950 to 2010. (AES, 2013)*

By using the low frequency shelf first, we are setting the size of the low end in relation to the rest of the mix. When setting the shelf, ask yourself, "Is the low end moving the speakers too much?" That may seem exciting in the studio, but it's unlikely to translate to consumer systems that are not designed for excessive low end. "Does the mix lack weight and size? Does the low end feel weak?"
It's best to start with a simple low frequency shelf because it does not change the relationship of the low-end instruments or octaves, only the overall size of the low end in relation to the rest of the mix.
I call this "Right Sizing" the low end. We are looking for that 1dB window to right-size the low end in relation to the whole mix.
I'll use a low-frequency shelf between 80 Hz and 150 Hz to set the right size of the low end of the mix. It can be helpful to close your eyes while you move the gain. That way, your eyes do not make the decision for you, your ears do.
2) Rebalancing the First Three Octaves
It's easier to think of music in octaves than in frequencies. We hear a total of 9.5 octaves, but only the first three consist of the lows and some low midrange. To balance the low end, you want to ensure that the energy is distributed properly among the first three octaves.
Octave 1 - 20Hz-40Hz - Deep subs. This area is perceived less as musical notes and more like a deep pillowy energy or rumble.
Octave 2 - 40Hz-80Hz - Fundamental bass. This is where the fundamental of the bass line and kick sits. The low E on an electric bass is 41Hz. If it's a 5-string bass, the low B is 31Hz. Same goes for an 808 sample that is a low E or B note.
Octave 3 - 80Hz-160Hz - This is the top of the lows and the start of the low midrange. This range will help define the musical note on smaller speakers and is commonly where the low-end attack of the kick or bass is perceived.
With the shelf, we set the overall weight of the low end; now, we are setting the distribution of energy between the first three octaves. I may pull up or down at 40 Hz or 120 Hz to redistribute the energy of the bass. (I removed the shelf from the graph below for demonstration purposes)

If I want to redistribute the energy away from the deep and rumbling sub area, I'll pull back at 30 Hz or 40 Hz with a shelf or bell. If I want more attack and transient energy from the low end instrument, I'll push up at 110 Hz to 140 Hz. If things feel too heavy or resonant, most likely 70 Hz to 110 Hz is taking up too much space. Pulling back the center frequency of 90 Hz will make the mix feel less congested and dense.
You can create all types of useful EQ shapes with a shelf and bell (or just two shelves). Here are some examples of how I may change the relationship between the first three octaves of a mix. Decibel values are excluded on purpose.

3) Set the Speed & Depth of the Low End
This last step is not always necessary. You have probably read all over the internet to "high-pass filter" everything, but I advise against that. I generally only high-pass filter if necessary. If there is excessive rumble or if the low end is feeling slow, I'll engage a high-pass filter, but I would most likely use another shelf first. I'll save my reasons for another day.
You may ask, "What do I mean by the low end sounding slow?" When there is excessive subs between 20 Hz and 40 Hz it can make a mix feel sluggish. Those frequencies tend to stick around and resonate for longer, making things feel slow. If the rhythm of the low end is particularly fast, then reducing the deep subs can give the low frequency rhythm more percussive clarity.
Set up a HPF with a 12dB per octave slope, close your eyes and drag the filter higher until you feel the low end getting lighter or faster. If you want the low end fast, you may want to aggressively high pass filter, but if you want pure and deep sub, it may be best to turn the HPF off and rely on another low frequency shelf to set the size of the sub. Here are some examples of the curves I may use to reshape the low end.

By setting the weight of the mix with a broad low frequency shelf, redistributing the energy of the first three octaves with bells, and setting the speed and depth of the low-end with a high pass filter, you can solve most low-frequency issues in a mix.
Occam's Razor - the simplest solution is almost always the best solution.
Give it a try and let me know what you think. Tag me on my @SchwabeDigital instagram and let me know what you think..
Be well,
Ryan Schwabe
Grammy-nominated and multi-platinum mixing & mastering engineer
Founder of Schwabe Digital

Simple Tips for Mastering
I am a minimalist at heart. I want processors that are simple, direct, and powerful. As engineers, we can quickly overcomplicate things.
I am a minimalist at heart. I want processes that are simple, direct, and powerful. As engineers, we tend overcomplicate things by inventing novel solutions to problems our ears may have exaggerated.

We try to create scientific solutions to the problems we hear, but sometimes those problems are not issues at all. Or our solutions create unintended consequences we might not notice in the excitement of our solution. We have to remember we are creating art, we are not doing scientific experiments. It is not our job to polish every problem away. That’s why I have come up with the ethos of “Don’t Do Too Much”. Because a lot of times doing too much is what makes music sound overcooked.
First Step - Start Clean
My first step in mastering is to push the record up to a loudness that is appropriate for the genre with Gold Clip and my favorite final limiter. Some people are anti-loudness, but I am not. I believe some genres benefit from loud masters. They create a sense of cohesion and density that is sometimes necessary for the production.

I'll start with the default Gold Clip preset and adjust the input level so peaks go to 0.0dBFS on the input meter (essentially no clipping), and then add 1dB to 2dB of Modern Gold. I then insert my favorite final limiter after Gold Clip and get the rest of my loudness. 2dB of Modern Gold means the final limiter will do 2dB of less gain reduction to achieve the loudness you desire.
When I want my master extra clean, I may turn the clipper off (command clicking the clipper) and only use the Modern Gold processing. However, turning the clipper off comes with some risks. Read more about those risks here.
It's rare, but for some songs, Gold Clip and a final limiter may be enough. However, this simple and loud version of the mix gives me the sound that I call "digital urgency."
Digital Urgency
Digital urgency is the pure, in-your-face version of the song. It is also most likely how the producer & engineer heard the song when they said, "This record is done. I usually get my master to the exact same loudness that I hear in their reference mix. By the way, I always ask for the pre-master and the reference mix so I can hear what was approved by the team behind the song."
Now that I have that loud, clean, and true-to-the-artist's-intention version of the song, the limiter may start to tell me about what is wrong with the mix. Most specifically, if the low end is pushed too hard, I'll hear the limiter's gain reduction bite down on the bass and kick hits and modulate the mid-range in a weird and ugly way.
If the mix is bitter or harsh sounding, that will come forward too. If the mix sounds boxy, then that boxy tone will be pulled forward even more. I then have to come up with solutions to fix those problems.
I tend to fix these problems with the cleanest solutions first and then move to using color tools. If the low end is buckling down into the limiter, it may need some low-frequency shelving or filtering with a clean EQ. I then ask myself, did that adjustment make the low-end interact with the limiter in a more natural way? Did I go too far and lose the power of the mix?
When To Compress
If things feel too loose or flappy in the mid-range, I may need some compression to give the song cohesion or bounce.
For mastering compression, I tend to filter out anything below 150Hz into the key input of the compressor. That way, the compressor is responding to and creating clarity in the mid-range and not bouncing around with the kick and bass.
Many modern mixes are so hyper compressed that compression is not always needed in mastering. Be judicious and consider how compressed the mix might already be. Also, listen to how the compressor interacts with the limiter. I often use a compressor to increase the attack of the kick as it hits the final limiter. Be intentful with the compressor. If you do not have an intended dynamic outcome in mind then most likely compression is not needed at all. If I do use compression, I always filter out the lows and tend to use slower attack times of 30-50 ms. That lets some transients through and increases punch.
Finding Balance
Clarity and power in the mid-range is the key to perceived loudness on streaming services. Sustained resonances in the mid-range will raise your average LUFS and reduce your perceived volume on streaming. Finding balance in this range is the where I spend a lot of time when mastering.
Does the mix feel tight, balanced and powerful in the midrange?
Does the mix now feel tight and balanced in the midrange?
If the mix is too brittle, pointy or harsh in the tops, maybe high-frequency shelving and some soft-knee de-essing will lessen that high-frequency fatigue.
Sometimes records have what I call "instrument-frequency discontinuity". What is that? It's when one instrument is particularly resonant in a frequency range and is poking out harshly in a mix. Maybe a tambourine is pointy around 12 kHz and mixed too loud. The easiest solution is to ask for a new mix, but sometimes that is not possible. In those situations, a tight EQ reduction to that frequency range is my first move. If the discontinuity is in the mid or high frequencies, I'll use a linear phase EQ. If it is below 2 kHz, I'll most likely use a natural phase EQ. If that EQ move is not enough to fix it, then I might move to a dynamic notch filter with Weiss de-esser or Kirchoff EQ.
Is the top end bright, but gentle enough to not fatigue the ear now?
These are all clean solutions to getting a balanced “true to mix” version of the record. I usually start with these or similar concepts first, and then move to more colorful approaches.
Adding Color (or not)
Once the loudness, balance, and dynamics are in place, I then start to think about how far I can push things, what I can experiment with, and what is appropriate for the genre.
We already made the decision about the loudness for the genre, but we have to ask ourselves what best serves the song.
Is this song best served by digital urgency and clarity, meaning no tubes, tape, or transformers, just that clean in-your-face sound?
Believe it or not, some productions sound much better that way, but others may need some extra flavor.
Some records may need some saturation, clipping, tape emulation, transformers etc. All of these devices start to add color, but move the record away from that digital urgency I mentioned earlier.
Know Your Role
Your job as an engineer is to decide what's appropriate. Is this going to be clean and pure like a Doja Cat or James Blake record, or is it going to be soft, rounded, and sauced up with color like a Tame Impala or Alabama Shakes record? Or maybe it lives somewhere in the middle?
Those decisions are yours, but I generally tend to start clean and make it sound as whole as possible, then add color as I see fit for the genre and the issues that the production presents.
In mastering, I always tell myself "don't do too much." In mixing, I am more often smashing things around more aggressively.
However, I usually solve problems with clean processors first and then move toward the colorful and crunchy processors after that. But keep in mind these approaches are interactive, and I often find myself circling back to my clean processors as the colorful ones make their mark.
Give it a try and let me know how it works for you. We all have our own solutions to the sonic issues we hear in our music, but these are the approaches that worked best for me and I hope they are meaningful for you.
Tag me on my @SchwabeDigital instagram and let me know what you think..
Be well,
Ryan Schwabe
Grammy-nominated and multi-platinum mixing & mastering engineer
Founder of Schwabe Digital

Mastering Secrets & Musical U-Turns: My Chat with Mike Indovina
I recently spoke to Mike Indovina of the Master Your Mix Podcast about how you can use clipping to your advantage.
I recently joined Mike Indovina on the Master Your Mix Podcast to share how you can use clipping to your advantage in your mixes.
We also explored the unexpected twists in my music career, my approach to mixing and mastering, and the reasoning behind when I reach for digital tools over analog gear.
If you're curious about the techniques and philosophy that define my approach to mixing and mastering—or if you just want an honest, unfiltered conversation about music—this episode is for you.
Take a listen below and let me know what you think. Hit reply or tag me on my @SchwabeDigital instagram.
Be well,
Ryan Schwabe
Grammy-nominated and multi-platinum mixing & mastering engineer
Founder of Schwabe Digital

Songs Made with Gold Clip
Below are some legendary engineers that are making music with a little help from Gold Clip. Read how they are using it and take a listen.
Below are some legendary engineers that are making music with a little help from Gold Clip. Read how they are using it and take a listen.
Stuart White (mixer)
Beyonce - Cowboy Carter
“I used Gold Clip on a few tracks from Cowboy Carter. I had it inserted on my aux groups clipping some peaks off.”


Bainz (mixer)
Young Thug - Oh U Went (ft. Drake)
“Gold Clip was the last plugin on the mix with a little bit of gold for Young Thug’s ‘Oh U Went’”

Jon Low (mixer)
Maya Hawke - “Missing Out”
“I have an instance of Gold Clip on the drum bus that's integral to the drum sound. It's acting slightly like a limiter through the clipping section in Classic mode. Classic Gold processing is at over 4db, really filling in some of the low level detail. On an acoustic drum kit, it adds excitement and punch in a totally different way than compressing. Gold Clip is also on the mix bus just doing a little work. The clipping is no more than 1-2db since the drum transients are already controlled early on.”

Tony Maserati (mixer)
Jesse Reyes - “SHUT UP (ft. Big Sean)”
“Used Gold Clip on this mix and so many more”

Benjamin Thomas (mixer)
Lil Uzi Vert - “Endless Fashion (ft. Nicki Minaj)”
“I used Gold Clip on the drum bus and the mix bus and every mix I have done since it came out.”

Chris Tabron (mixer)
Jensen McRae - “Massachusetts”
“In the year since I've been using Gold Clip, I've gone from putting it on at the end of a mix for just a dash of magic, to getting it in the chain fairly quickly after my balances and making lots of decisions through it. Just a bit of Gold Processing, and a touch of Alchemy gives me something inspiring to push into, without sacrificing any fidelity. You can hear this most recently on Jensen McRae's latest single Massachusetts.”

Ryan Schwabe (mixer)
BAYNK - “Blood”
“This song is intentionally crunchy sounding. I used Gold Clip on the mix bus with 4dB of Classic Gold to make it sound like the record is bleeding a bit.”

One Year of Gold Clip
From launch to legend, GOLD CLIP has come a long way in one year. Several months before the release, I started an Instagram to talk my way through the making of Gold Clip.

From launch to legend, GOLD CLIP has come a long way in one year.
Several months before the release, I started an Instagram to talk my way through the making of Gold Clip. I made endless memes, bleached my hair gold, and sh*t posted my ride through the long and difficult development process. I made the project an open diary and chaotically posted "coming soon" everyday. A lot of you made suggestions along the way and even got involved in Gold Clip’s early development. Many of those comments and DMs were instrumental in what it is today. It was a wild ride and I never expected how long it would take to get over the finish line. And once I crossed that line, I didn’t expect it to end up in the hands of so many legendary creators around the world.
At the time of the release, I was an Associate Teaching Professor of Recording Arts and Music Production at Drexel University's music industry program and a full-time mixing and mastering engineer. Originally, I built Gold Clip for my own work as an engineer. It was a passion project that took over my life for nearly three years. Every dollar I made in music I dumped back in to Gold Clip. My music friends grew tired of hearing me ramble on and on about compression without attack and release. It was a long ride, but I had some trusty co-pilots and I just kept it moving. I told myself that if I didn't use Gold Clip in my own work, then I wouldn't release it. And that has been the ethos for all of my plugins since.
Schwabe Digital is here to stay. I can't tell you too much about my future plans right now, but I am making some new and innovative tools. First, we will release our debut FREE plugin - something simple and cool for the culture. Then, I cannot wait to share with you the next device, a FREE add on plugin for all Gold Clip owners. Gold Clip will become Gold Clip Pack. We are grateful for all of your support and want to give back to what you all started. After all that, we will release a new groundbreaking plugin that I have been using on all of my masters since the first alpha version. More on all of that later.
Be well,
Ryan Schwabe
Grammy-nominated and multi-platinum mixing & mastering engineer
Founder of Schwabe Digital


Podcast: A Conversation About the Art of Mastering & Mixing with Bobby Owsinski
A while back, I had the pleasure of being interviewed by the legendary author Bobby Owsinski on his podcast,
Hey all,
A while back, I had the pleasure of being interviewed by the legendary author Bobby Owsinski on his podcast, The Inner Circle. Bobby is the author of The Mix Engineer's Handbook, The Recording Engineer's Handbook, The Mastering Engineer's Handbook, and many more.
I always loved Bobby's books and was honored to be interviewed by him. On the podcast, we spoke about learning the art of mastering, my philosophy on mixing, not being tied to certain mixing techniques, developing plugins, and much more. I thought I would share. Click the image to listen to the interview on YouTube.

Tag me on my @SchwabeDigital instagram and let me know what you think..
Be well,
Ryan Schwabe
Grammy-nominated and multi-platinum mixing & mastering engineer
Founder of Schwabe Digital

What’s the Difference Between GOLD CLIP and ORANGE CLIP?
I often get this question…
What’s the differences between Gold Clip and Orange Clip?
GOLD CLIP is a clean, high-precision mastering tool that uses its unique loudness technology called Gold and Alchemy to create exceptionally smooth and loud masters. It sounds lush, expensive, bold, and gives recordings the last 5% of detail we all strive for. It emulates a well-known golden mastering device used on thousands of hit records, and builds on that distinctive dynamic process with advanced anti-derivative, anti-aliasing oversampling technology.
ORANGE CLIP is a loud and aggressive production & mixing clipper that emulates the sound of a legendary DAW for music production. It can be driven hard for added bite or used subtly for warmth and character. It is a color box, enhancing lows, smoothing the mids, and flattening the high end in a unique and pleasing way. While not transparent, it is a familiar tone we have all grown to know and love. With minimal CPU usage and 0 samples of delay, it’s easy to incorporate Orange Clip into your production workflow.
Should I use ORANGE CLIP and GOLD CLIP together?
YES, there are no rules and each clipper has its unique and distinctive sound.
GOLD CLIP is often used to maintain clarity, increase perceived loudness, energy and detail of the whole mix or grouped instruments.
ORANGE CLIP is often used to provide aggression, color, character, and to shape transients of individual or grouped instruments in a mix.
Check out this short video on why I built Orange Clip
Be well,
Ryan Schwabe
Grammy-nominated and multi-platinum mixing & mastering engineer
Founder of Schwabe Digital

Podcast: Making Records & Plugins with Help Me Devvon
Back in March of 2024, I did an interview with Devvon Terrell, L.Dre, and Courtney Taylor of the Help Me Devvon / Audio Nerds podcast…
Hey All,
Back in March of 2024, I did an interview with Devvon Terrell, L.Dre, and Courtney Taylor of the Help Me Devvon / Audio Nerds podcast, and I wanted to share it with you. On the pod, we discussed my career in music, a few techniques I have found effective in my mixing and mastering work, making Gold Clip, Orange Clip, and developing my new plugins. Click the image below to watch it on YouTube.
Tag me on my @SchwabeDigital instagram and let me know what you think..
Be well,
Ryan Schwabe
Grammy-nominated and multi-platinum mixing & mastering engineer
Founder of Schwabe Digital

Mixing & Mastering in Headphones
Mixing and mastering records for a living means that you will be working long hours, and those hours often bleed into your personal life…
Mixing and mastering records for a living means that you will be working long hours, and those hours often bleed into your personal life. Throughout my entire career, I did all of my work "in the studio" and refused to use headphones. The problem was that if I traveled, work would build up day by day. Remasters, mix updates, reprints of alternate mixes would stack up.
All this recall work could easily be done on the go, but it was stacking up while I was away and it was stressing me out. When the M2 MacBooks came out, I realized those computers had the power to do my recall work when traveling. You might think this sounds like a compromise, but the results have been surprisingly good, and and I even got to the point that I could start and finish projects in my mobile set up with the same quality (or better) than my studio set up.
EQUIPMENT
I replaced my desktop studio computer with a laptop and hub and set myself free. I was now mobile, but the bigger issue to solve was my monitoring. I work in a finely tuned room with Kii Audio Three speakers fed digitally from my Trinnov, which is fed digitally from my studio computer. I tuned my room over many years while working on thousands of mixes and masters. It was going to be difficult to replicate that system in headphones, but I knew it was possible. I bought a Grace Designs m900 headphone amp and a pair of Audeze LCD-5 headphones. Yes, these are expensive options, but I do this for a living and do not cut corners on monitoring.

I love the Audezes LCD-5s, but to be honest, they alone did not match the sound of my room. They were a bit forward in the mid range, light and slow in the low end and a hair rolled off on the top. You might think that is a bad review for a pair of $5,000 headphones, but I am competing with a $20,000 playback system. The truth is, the LCD-5s had transient detail and clarity that I never heard from other headphones. I knew it was possible to make them work, but I needed to change the balance of the LCD-5s to get the same reliable results I get from my mains. So, I built a playback EQ for my headphones that matched the balance of my room.
BUILDING THE PLAYBACK EQ
I wanted to be able to get the same masters from my headphones as I did in my studio — no compromises. I consulted the legendary engineer and author Bob Katz and he sent me his LCD-5 EQ playback curve, but I still felt it needed refinement to match the sound I was hearing in my room. We all have different preferences and what worked for Bob and his work does not necessarily work for me.
I spent the next 6 months EQ'ing my LCD-5s to match my studio mains. I would master a record on my LCD-5s, and then check it on my mains. The adjustments I made to the masters on my mains would then be integrated into my playback EQ for my headphones.
Eventually, the masters I did on my headphones no longer needed refinement when I checked them on my mains, and at that point, I was comfortable working on my LCD-5s.
For those that are unclear, “playback EQ” is equalization that we monitor, but not that we print into the mix / masters we deliver.
PLAYBACK EQ SETTINGS
Below is the EQ that I landed on for my LCD-5s. I think the EQ curve will work for any of the Audeze headphones, but will likely need some slight adjustments. The LCD-5s use a planar driver which is faster and can be more detailed and mid-forward than the other models. So, adjustments to the mid-range may be necessary for the other models.
This EQ may work for other brands of headphones as well, but I am sure it will need some adjusting it to match your brand and personal preferences.
HPF - 15Hz, 12dB per octave - Makes the low end move a little faster.
45Hz, +0.6dB .5Q - Makes the low end fuller and reduces the boosting you may be inclined to do in that range.
111Hz, -0.6dB .5Q - Reduces the punch.
3,900Hz, -0.8dB .3Q - This mid range cut pulls back the bitterness and ensures your masters have presence.
3,900Hz, -0.5dB 2.0Q - Again, this tighter mid range cut pulls back the bitterness and ensures your masters have presence.
18,000Hz, +0.85dB .3Q - This top end boost accommodates the slight roll off and ensures you do not make overly bright/airy masters.
The presets for Plugin Alliance Kirchoff EQ and FabFilter Pro-Q3 can be downloaded below.


Let me know what you think of the curves. Did you adjust them to your liking, and if so, how?
That’s it for now.
Tag me on my @SchwabeDigital instagram and let me know what you think..
Be well,
Ryan Schwabe
Grammy-nominated and multi-platinum mixing & mastering engineer
Founder of Schwabe Digital

01) Introducing Orange Clip
ORANGE CLIP is inspired by the unique stock clipper found in one of the most legendary digital audio workstations for modern music production. The clipper itself is simple, but it has a bold and unique sound that you have heard in many modern productions.
ORANGE CLIP
A Legendary Sound in Any DAW
ORANGE CLIP fills a void in my toolbox with a distinct sound that I have always struggled to recreate. It's a completely different tool than Gold Clip. While Gold Clip is a big-brain, high-precision mastering & mixing tool, Orange Clip is a simple production tool that recreates the classic blown-out tone that beat makers and electronic producers have grown to love for more than 25 years. But Orange Clip is not just for beat makers, it is prolific in any genre.
Orange Clip is inspired by the unique stock clipper found in one of the most legendary digital audio workstations for modern music production. The clipper itself is simple, but it has a bold and unique sound that you have heard in many modern productions. It inflates low frequencies, flattens highs, and smooths the mid-range in a relaxed and pleasing way. We re-engineered that infamous soft clipping sound and updated it to meet the needs of modern music mixing engineers and producers.
Orange Clip is a faithful recreation of that infamous sound. We carefully modeled the clipping, wave shaping, overload, dynamic and harmonic effects of that famed sound. Mathematically, it is identical. However, in addition to mathematically matching that famed sound, we also added some features that we think make Orange Clip eclipse the tool it was inspired by. And we also made it available in every DAW (AU, VST3, and AAX).
Orange Clip features a wave shaper, a true parallel mixer, a clip ceiling control, linkable I/O trims, realtime, offline, linear and minimum phase oversampling settings, and an animated transfer function display.
Are we crazy for spending an endless amount of time researching and emulating a stock DAW plugin that is more than 25 years old?
Yes
Did we do it anyhow?
Yes
Did we add a bunch of modern features?
Yes
Welcome to ORANGE CLIP
Watch this 10-minute overview video from Maria Elisa Ayerbe.
Be well,
Ryan Schwabe
Grammy-nominated and multi-platinum mixing & mastering engineer
Founder of Schwabe Digital


02) Using Orange Clip
ORANGE CLIP is a simple tool that might not even need a manual. There is essentially one knob that affects the sound, ORANGE. And it is right there in the center of the plugin.

ORANGE CLIP is a simple tool that might not even need a manual. There is essentially one knob that affects the sound, ORANGE. And it is right there in the center of the plugin.

The dB value displayed in the ORANGE knob indicates the knee's shape or size. The default is a Medium knee clipper with a value of -4.4 dB. If you turn it counter-clockwise to -51.8dB it is a Soft knee clipper. And if you turn it clockwise to 0.0dB it is a Hard knee clipper.
You will also need to gain the signal into the clipper (or wave shaper). Similar to Gold Clip, we created two ways for you to do this while maintaining perceived volume.
The first way is by linking the input and output trims. Simply click the 🔗 symbol above the transfer function.

Adjust the Input Trim to achieve the desired amount of clipping on the CLIP indicator above the input meter. Ideally, a range of 0 to +3 dB is recommended.
Additionally, you can use the Clip Ceiling to set the desired amount of clipping. The white Clip Ceiling bar floats over the input meter and looks like this…

Adjust the Clip Ceiling by lowering it over the input meter until the input signal exceeds the white ceiling line. Again the amount of clipping is shown in the CLIP display above the input meter. Generally, 0 to +3dB is good. If the CLIP display is negative, keep dragging the ceiling down until you get the desired amount.

Clipping occurs throughout that infamous DAW. It clips in the sampler, on tracks, and on the mix bus; everything might be clipping or overloading, and that is what makes it sound so unique.
Now, with Orange Clip, you can replicate all the overloading and crunching in any DAW. Based on my experiments, all of those types of overload utilize a variation of Orange Clip's distortions and wave shaping. We spent countless hours iterating until we found the exact mathematical equations that make up the sound of Orange Clip. It is everything you need to get that legendary sound, plus a lot more. Orange Clip is simple, clean, and robust, and it has been on every one of my mixes since I got the first alpha version.
That's it for now. Next time, we will get a little nerdy and talk about how transfer functions work.
Be well,
Ryan Schwabe
Grammy-nominated and multi-platinum mixing & mastering engineer
Founder of Schwabe Digital
Designer of Gold Clip & Orange Clip
p.s. If you haven't already, you can buy or rent-to-own ORANGE CLIP right here.

03) Understanding Transfer Functions
In the last post I spoke a bit about why I built ORANGE CLIP, its sound, and some basics about its functionality.

In the last post I spoke a bit about why I built ORANGE CLIP, its sound, and some basics about its functionality. Today, I want to talk about some nerdier stuff: the basics of transfer functions and wave shaping.

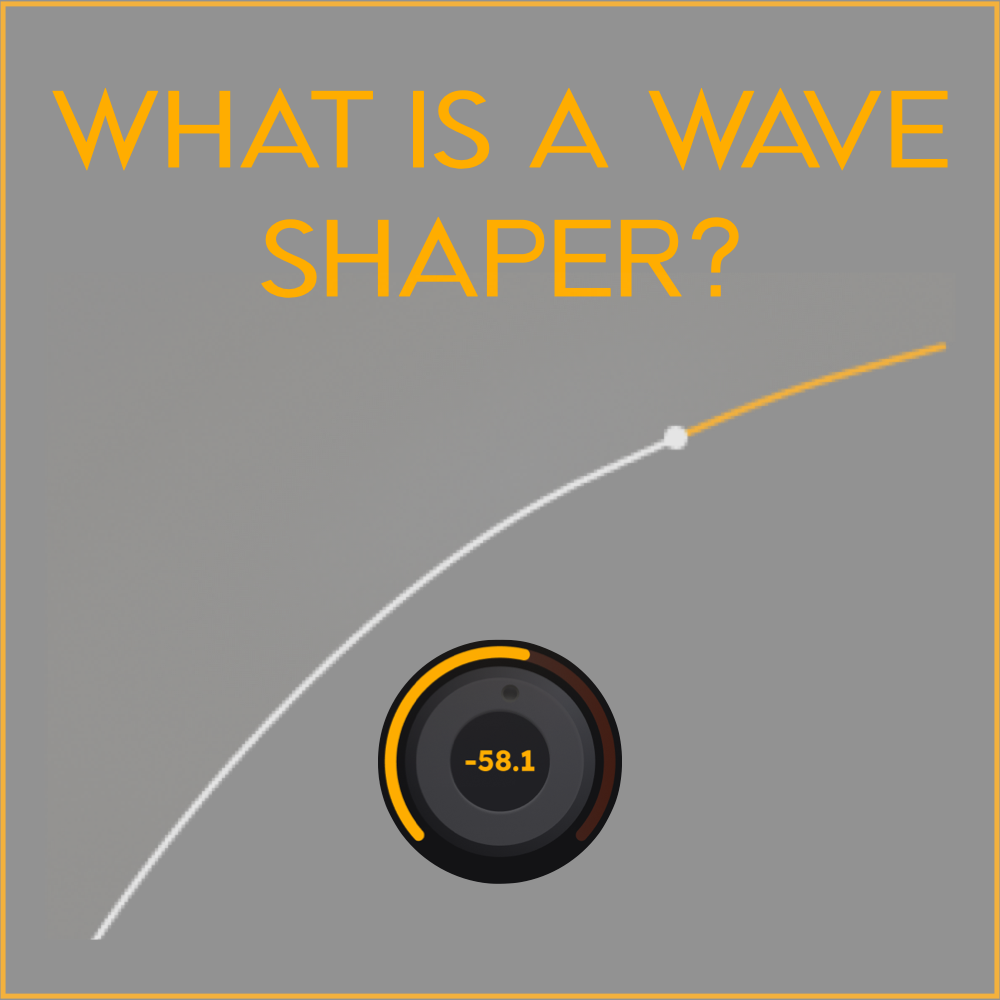
Orange Clip is technically a wave shaper. Before you can understand what a wave shaper is, it is important to understand how to read a transfer function. A transfer function is a simple way to display the input signal and output signal of a nonlinear process.
Image (1) shows a linear relationship between input and output. The X-axis shows the input, or source, the Y-axis shows the output, or destination. The dotted line shows the linear relationship between input and output.

As you can see on image (2), an input signal of -5dBFS produces an output signal of -5dBFS. The arrow shows the signal going into the processor from the bottom and out of the processor to the left. There is no change to the signal - it is a linear process. -5dBFS input = -5dBFS output.
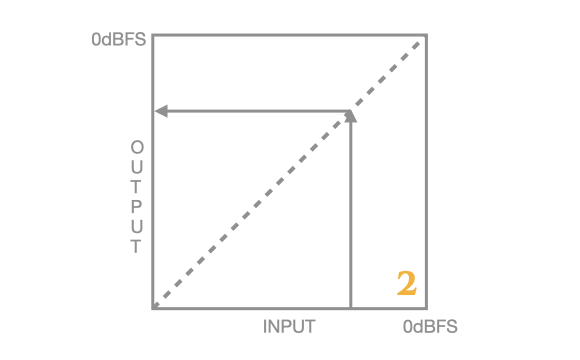
Image (3) shows a non-linear gain change. The output signal is slowly reduced as the input signal increases. In this example, an input signal of -5dBFS has an output of -9dBFS. The arc of the gain change from input to output is what defines the wave shaper's sound and it's what took us so long to get right about Orange Clip. Changing the amplitude of a signal like this is by definition, distortion. By changing the shape of the waveform, we are not only changing the peaks but also adding harmonics and augmenting the tone of the signal.

By gradually changing the ascent and descent of the waveform with ORANGE, we change the tone of the track by rounding the waveforms. This process may seem simple, but it can significantly alter the overall tone of the record. It's important to note that this process occurs below the clip point, meaning that it will affect the record even if your clip value is 0dB, meaning no clipping.
In the next post, I'll go a little deeper into how wave shapers work.
Be well,
Ryan Schwabe
Grammy-nominated and multi-platinum mixing & mastering engineer
Founder of Schwabe Digital
Designer of Gold Clip & Orange Clip
p.s. If you haven't already, you can buy or rent-to-own ORANGE CLIP right here.