
04) What is a Wave Shaper?
In the last post we spoke a little about how transfer functions and wave shapers work. Today we will dig in a little deeper into how wave shapers like ORANGE CLIP work.

In the last post we spoke a little about how transfer functions and wave shapers work. Today we will dig in a little deeper into how wave shapers like ORANGE CLIP work.
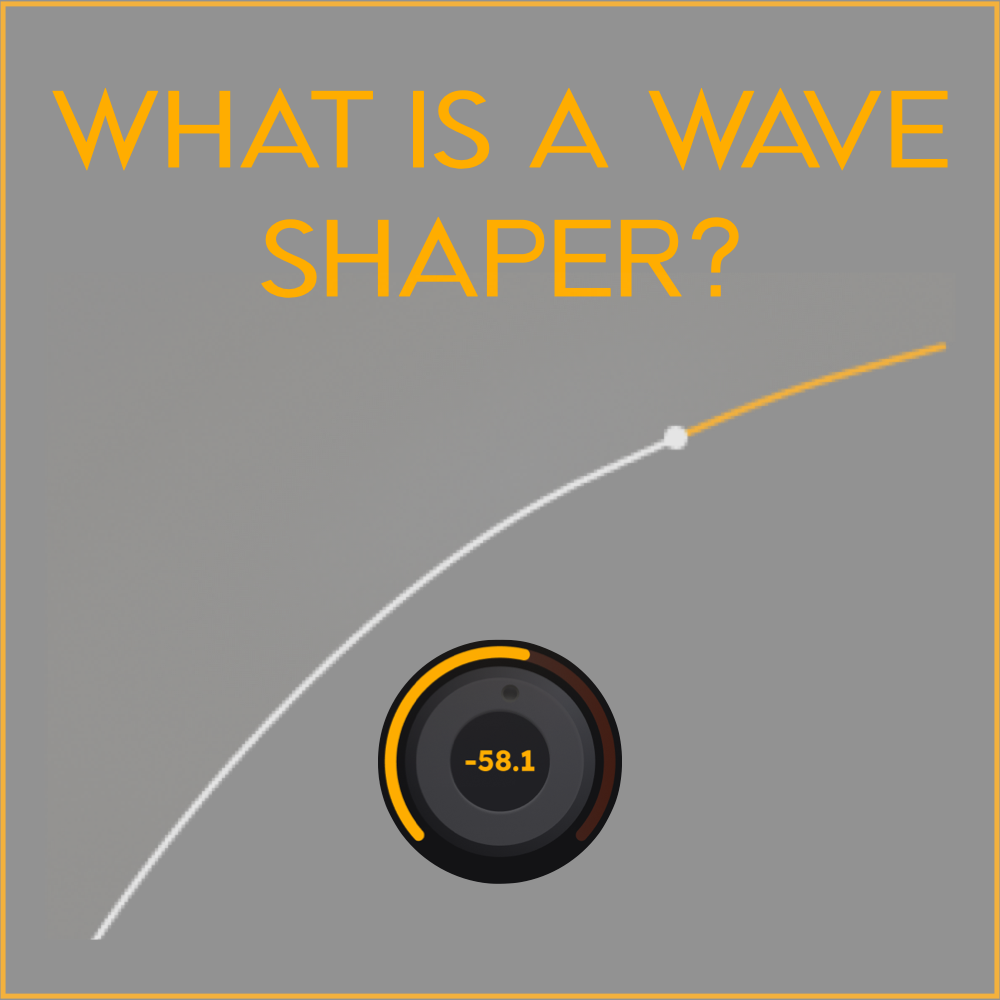
A wave shaper is a clipper, and a clipper is a wave shaper. They are essentially the same thing. It is an audio effect that changes the signal by applying a mathematical shaping function. What? In my mind, a more appropriate term would be "amplitude shaper" because it is changing gain in real-time, but nobody says that. A wave shaper changes the amplitude of the peaks instantaneously with a mathematical equation. Remember exponential functions in math class? Yeah, it's something similar to that.

When a traditional transfer function is used as a display for a processor, like above, it is assumed that the wave shaping is symmetric; meaning it is affecting the positive and negative side of the wave form in the same way. Not all wave shapers are symmetric, but Orange Clip is.

When we look at a waveform in a DAW (image above) we see both the positive and negative side of the waveform. Essentially when the speaker pushes out and when it pulls in. A traditional transfer function only shows one side of the waveform. If we were to show both sides of the waveform, the wave shaper display would look like the orange line on image (2). The dotted line represents the input and the orange line represents the wave shaped output.

For the image above, I super imposed Orange Clip's transfer function over the positive and negative side of a waveform to emphasize the concept.
That's just scratching the surface of transfer functions and wave shapers, but it should give you a better idea of what is happening when you watch that white ball bounce along the orange line of Orange Clip.
Next time we will go a little deeper on ORANGE processing.
Be well,
Ryan Schwabe
Grammy-nominated and multi-platinum mixing & mastering engineer
Founder of Schwabe Digital
Designer of Gold Clip & Orange Clip
p.s. If you haven't already, you can buy or rent-to-own ORANGE CLIP right here.


05) What is a ORANGE Processing?
The ORANGE setting determines the size and shape of the wave shaping applied to the track. You can consider it a threshold on a compressor. It is the level at which the signal starts to wave shape or compress.

In the last post, I spoke about how wave shapers work, and today we will get into ORANGE processing. Surprise, it is a wave shaper.

The ORANGE setting determines the size and shape of the wave shaping applied to the track. You can consider it a threshold on a compressor. It is the level at which the signal starts to wave shape or compress. It is the length of the wave shaping down from the ceiling setting. The ORANGE setting goes from 0.0 dBFS (hard clipping) to -51.8 dBFS (soft clipping / shaping). The ORANGE dB value is where the wave shaping begins and the ceiling setting is where the curve ends.

If you set ORANGE to 0.0dB (clockwise) the transfer function is linear (a strait line) up until the clip ceiling setting. With this setting the processor is not wave shaping, it is hard clipping into a brick wall at the clip ceiling setting. This tends to sound brighter, more aggressive and sometimes crunchy.

If you set ORANGE to -51.8 (counter-clockwise), the input signal starts to wave shape at -51.8 dB below the ceiling setting. This is a soft knee curve that smooths out and takes the bite out of the signal. If there is a clicky or pointy kick drum in the mix, it will push that pointy sound further into the track and make things sound more round.

The default setting of -4.4 dB starts to wave shape 4.4 dB below the clip ceiling setting. This medium knee curve works in many situations and has a pleasing tone that smooths the midrange and subtly expands the lows. If you want it to sound softer and deeper, turn ORANGE counterclockwise. If you want it harder or firmer, turn clockwise.
You can think of the orange as a tone knob, but in reality, it is changing the tone by drastically affecting the dynamics of the track. If you add in some clipping and you are now are intermixing tone and distortion.
That should be enough to give you an idea of the power of Orange Clip. In the next post we will talk a bit about the ceiling, trims and metering.
Be well,
Ryan Schwabe
Grammy-nominated and multi-platinum mixing & mastering engineer
Founder of Schwabe Digital
Designer of Gold Clip & Orange Clip
p.s. If you haven't already, you can buy or rent-to-own ORANGE CLIP right here.
06) Using the Ceiling, Trims & Metering
The ceiling control floats over the input meter, allowing you to clip extremely low-level signals without changing the input trims.

In the last post I spoke about the power of ORANGE processing and today I want to talk a bit about some of the controls and displays of Orange Clip and what they mean.
CEILING CONTROL

The ceiling control floats over the input meter, allowing you to clip extremely low-level signals without changing the input trims. If a snare drum peaks at -24dBFS, you can pull the clip ceiling down to -25dBFS and get 1dB of clipping. You can then adjust the ORANGE setting to get the desired hard, medium, or soft knee clipping. It simplifies the clipping process by moving the clip point away from 0.0dBFS. The ceiling setting determines the top of the wave shaper and ORANGE determines the bottom. By adjusting the ceiling, you are moving the clip point down and away from 0.0dBFS. If the ceiling is set to -6dBFS and ORANGE is set to -10dB, then wave shaping will start at -16dBFS. The input signal below -16dBFS will be linear, and the signal above -6dBFS will be approaching hard clipping.
INPUT TRIM
Input trim is applied to the input signal and the input meter shows the input signal + input trim. The trim floats over the input meter and allows for +/- 12dB of gain. So, if you push up the input trim, you will see that gain push the meter closer to the clip ceiling.
OUTPUT TRIM
Output trim is applied to the entire plugin output after the true parallel mixer. If the output exceeds 0.0dBFS then the PEAK display will turn orange and show a positive value. Double click to reset.
TRIM LINK

Trim Link floats over the transfer function allows you to maintain perceived loudness when changing input or output trim. When turning the input trim up by 1dB, Gain Link will turn the output down by 1dB. Just like Gold Clip.
METERS
The input and output meters are white and fade to orange as the waveshaping intensifies. When the signal crosses the white ceiling on the input meter, the signal is clipping or approaching clipping, depending on the curve of the knee.
CLIP VALUE

When the signal goes above the clip ceiling on the input meter the clip value will turn orange and show a positive number. That number theoretically implies clipping, but it depends on the shape of the knee that you are using. If you are using a hard knee of 0.0, then it will show the dB that was clipped off the peaks. If you are using a soft knee, then it shows the amount of signal above the ceiling that was wave shaped down, but not necessarily hard clipped.
OUTPUT PEAK LEVEL

If the output signal goes above 0.0dBFS the PEAK display will turn orange and show a positive value. To bring the output below 0.0dBFS simply use the output trim to reduce the output to an appropriate level.
That's it for now. In the next post, I'll talk about the power of the true parallel mixer.
Be well,
Ryan Schwabe
Grammy-nominated and multi-platinum mixing & mastering engineer
Founder of Schwabe Digital
Designer of Gold Clip & Orange Clip
p.s. If you haven't already, you can buy or rent-to-own ORANGE CLIP right here.

07) Using the True Parallel Mixer
In the last email we talked about some metering and user controls of ORANGE CLIP. Today we will discuss the power of the the true parallel mixer.
In the last post we talked about some metering and user controls of ORANGE CLIP. Today we will discuss the power of the the true parallel mixer.
We believe in allowing you to control everything about your mix, so we added a true parallel mixer to Orange Clip, just like we did for Gold Clip.
With almost all DAWs running at 32bit float you have 1528dB of dynamic range to work with. Your DAW has all the bandwidth it needs to handle parallel processing, but it’s your responsibility to manage your session gain-staging and not overload your mix bus or plugins. You should try to keep Orange Clip‘s output below 0.0dBFS, but the output can go well above that if you choose.
Orange Clip gives you individual control of both the dry and wet signals. That means you can unlink the dry and wet and create your own blends that go beyond percent-based blends you find on most plugins. However, if you prefer that style of dry/wet, just leave the parallel mixer in the default state, and you have it.

When Link is on, the faders operate like a traditional dry/wet fader found on most plugins. When Link is off, the dry and wet faders work independently, making Orange Clip a true parallel processor. You must be careful when using the mixer unlinked because you can make the signal twice as loud by setting both the dry and wet faders to 0.0 dBFS, and that will most likely clip processors following Orange Clip. Use the output trim to lower the output if it is above 0.0 dBFS.
There are endless creative possibilities with the true parallel mixer. You can put the dry at full volume and blend in a hyper clipped signal. Or, clip the signal and then re-introduce dry peaks to the blend.
Thats it for now. In the next post we will discuss oversampling in Orange Clip.
Be well,
Ryan Schwabe
Grammy-nominated and multi-platinum mixing & mastering engineer
Founder of Schwabe Digital
Designer of Gold Clip & Orange Clip

08) Oversampling in Orange Clip
Today we will dig into the basics behind the oversampling in ORANGE CLIP. We spent months getting the wave shaping in ORANGE CLIP just right, and then added all of the oversampling functionality of GOLD CLIP.

In the last post we spoke about some of the uses of the parallel mixer. Today we will dig into the basics behind the oversampling in ORANGE CLIP.
We spent months getting the wave shaping in ORANGE CLIP just right, and then added all of the oversampling functionality of GOLD CLIP.
I designed Gold Clip and Orange Clip to have a consistent sound regardless of the sampling rate of your DAW. To achieve this, we programmed the oversampling rate to modulate depending on the sample rate of the session. That way, High, Pristine and Extra Pristine sound exactly the same, regardless of the sample rate of your session. Let me break down how it works.
OVERSAMPLING RATE
OFF - 0x (44.1kHz & 48kHz sessions), 0x (88.2kHz and 96kHz sessions)
High - 4x (44.1kHz & 48kHz sessions), 2x (88.2kHz and 96kHz sessions)
Pristine - 8x (44.1kHz & 48kHz sessions), 4x (88.2kHz and 96kHz sessions)
Extra Pristine - 16x (44.1kHz & 48kHz sessions), 8x (88.2kHz and 96kHz sessions)
Orange Clip allows you to select separate sample rates for real-time processing and offline bouncing. This allows you to monitor with a lower hit to your CPU but render/bounce with extreme oversampling.
OVERSAMPLING TYPE
Linear Phase – Uses a custom linear phase oversampling technique. This option is suggestion if you are doing parallel processing within Orange Clip.
Minimum Phase – Uses a custom minimum phase over sampling technique. This option is sometimes better for low frequency transient information that does not require parallel processing. When in minimum phase mode the delta function will present some of the phase rotation that is common with minimum phase oversampling. Phase rotation is completely normal behavior and is common in many audio processors.
Thats about it for oversampling. We tried to make it simple and strait-forward so you don't have to waste time thinking about it. In the post email we will talk about some of the precision and detail that went into designing Orange Clip.
Be well,
Ryan Schwabe
Grammy-nominated and multi-platinum mixing & mastering engineer
Founder of Schwabe Digital
Designer of Gold Clip & Orange Clip
p.s. If you haven't already, you can buy or rent-to-own ORANGE CLIP right here.
09) Developing Orange Clip
We spent an endless amount of time trying to determine the exact mathematical equation that makes ORANGE CLIP sound so good, and that equation matches its inspiration in every detail: dynamically, harmonically, and sonically.

We spent an endless amount of time trying to determine the exact mathematical equation that makes ORANGE CLIP sound so good, and that equation matches its inspiration in every detail: dynamically, harmonically, and sonically.
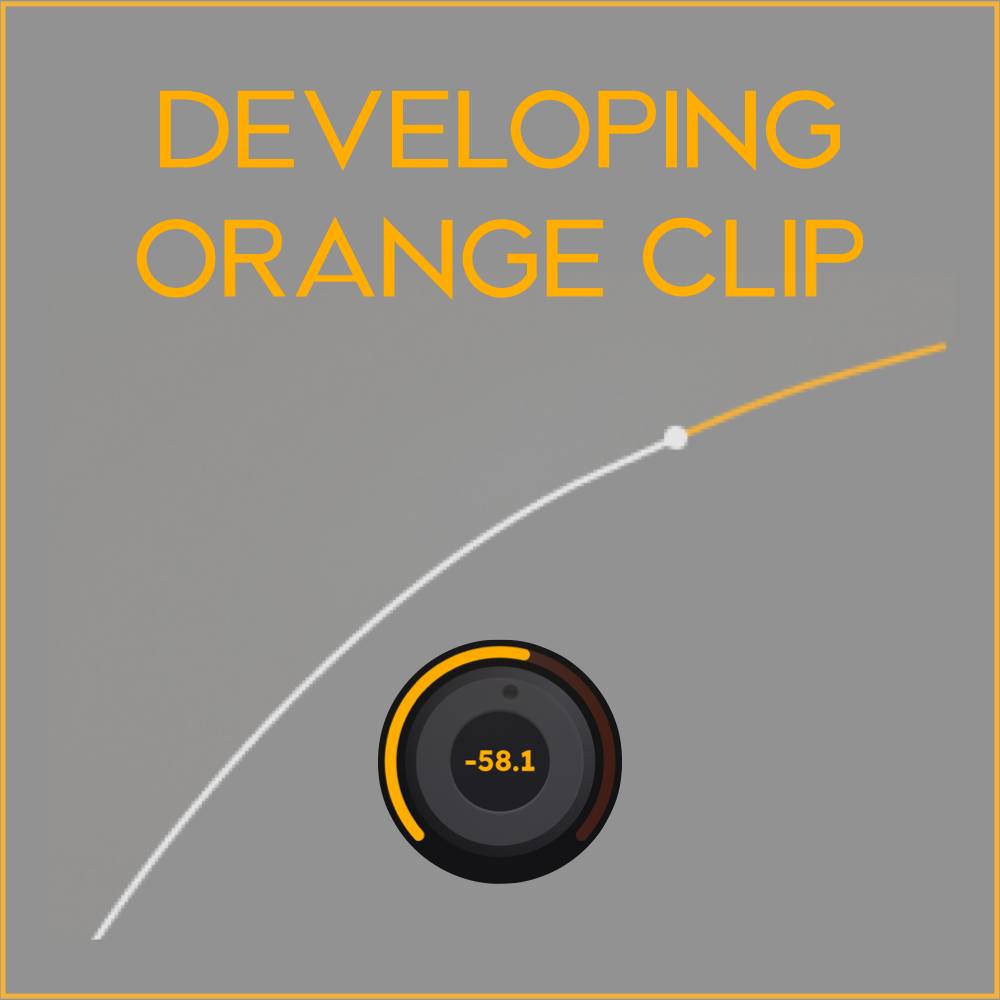
Below is an animated transfer function that shows the dynamic response of ORANGE CLIP and its inspiration. The animated orange line shows the dynamic response of ORANGE CLIP between the Hard Knee (0.0dB) and 100% Soft Knee (-58.1dB) settings.
The green dotted line shows OC's inspiration at 100% Soft Knee. The red dotted line shows the 75% Soft Knee setting, and the purple dotted line shows the 50% Soft Knee setting. As you can see, the curve of ORANGE CLIP perfectly matches each plot of its inspiration. Dynamically, it is 100% identical.

Next we will look at the harmonic response of ORANGE CLIP compared to its inspiration. The below graph shows the harmonics generated by each process when fed a 100Hz sine wave. Again, as you can see, the harmonic make up of each processor is identical.

Getting these details right took months of research, testing, trial and error until we finally figured it out. We were searching for a needle in an exponential function haystack but we found it, and now ORANGE CLIP is yours to enjoy in your DAW of choice.
Be well,
Ryan Schwabe
Grammy-nominated and multi-platinum mixing & mastering engineer
Founder of Schwabe Digital
Designer of Gold Clip & Orange Clip
p.s. If you haven't already, you can buy or rent-to-own ORANGE CLIP right here.

Using Orange Clip & Gold Clip Together
A few weeks back, my friend Ken Lewis asked me to make a video about how I use Gold Clip and Orange Clip for his Mixing Night Podcast. I decided to throw that video on my YouTube page and share it with you.
A few weeks back, my friend Ken Lewis asked me to make a video about how I use Gold Clip and Orange Clip for his Mixing Night Podcast. I decided to throw that video on my YouTube page and share it with you.
In the video, I first show how I use GoldClip in a clean and transparent way on a master for a blues song. Then, I use both Orange and Gold Clip together to make an electronic record sound aggressive and over the top.
Take a listen below and let me know what you think. Hit reply or tag me on my @SchwabeDigital instagram.
Be well,
Ryan Schwabe
Grammy-nominated and multi-platinum mixing & mastering engineer
Founder of Schwabe Digital
Designer of Gold Clip & Orange Clip
p.s. If you haven't already, you can buy or rent-to-own ORANGE CLIP right here.


Celebrating 6 Months of Gold Clip!
Today marks the 6-month anniversary for the release of GOLD CLIP. I want to take this time to thank you all for the support and love you have shown.

Today marks the 6-month anniversary for the release of GOLD CLIP. I want to thank you all for the support and love you have shown. Especially to those who followed my journey on IG while I was sh*t posting my way through the Gold Clip development process.
2024 will be a big year for Schwabe Digital. We are releasing our second plugin early next year. That release will be a fun production- and mix-focused plugin. Watch out for that announcement early next year.
Then, shortly after that, we will release another mastering tool that will complement Gold Clip. That plugin has been on all of my masters since the first version I received from my development team. It sounds stunning.
And finally, we will release our third mastering tool at the start of 2025. All the while, we will continue to maintain and upgrade Gold Clip.
Gold Clip has been adopted by some of my favorite mixing and mastering engineers. Bains, Teezio, Jesse Ray Ernster, Ben Thomas, Jon Low, Nicolas de Porcel, Tony Maserati, Justin Perkins, Eric J. Dubowsky, and so many more are using Gold Clip.
Gold Clip has made its way on to countless hit records from Burna Boy, Doja Cat, Kanye West, City Boys, ODESZA, Lil Uzi Vert, OFFSET, Mariah the Scientist, Fridayy, Chris Brown, DJ Shadow, Lady Blackbird, Tee Grizzley, Cochise and thousands of others.
Tag @SchwabeDigital in an instagram story and show us what records you have been using Gold Clip on. We'll repost.
I am so excited to bring new and exciting tools to the production and engineering space in 2024. Please stay tuned.
Thank you all for following along, sharing and showing support!
Be well,
Ryan Schwabe
Grammy-nominated and multi-platinum mixing & mastering engineer
Founder of Schwabe Digital


The New GOLD CLIP 1.2.1 is Here!
We have an updated interface, new oversampling options, a new downsampling filter technique, and some long-requested new features.
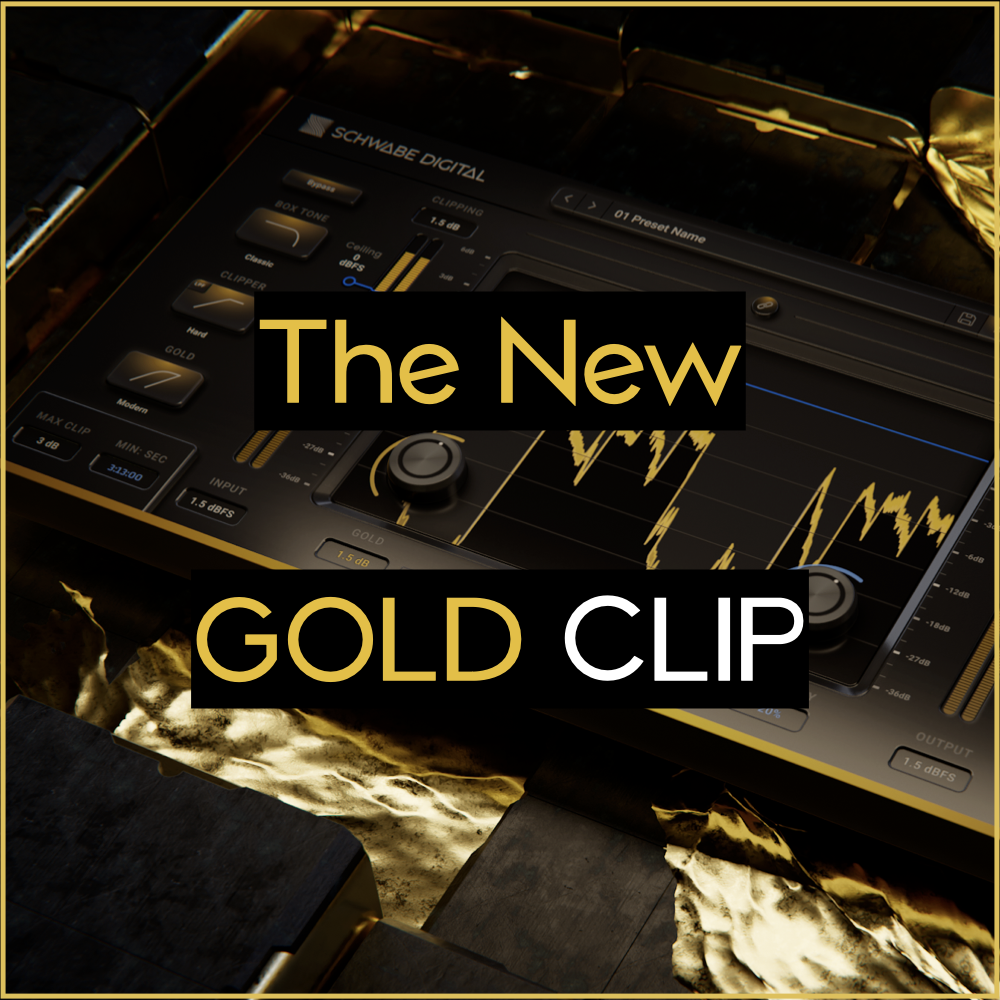
We are very excited to bring you GOLD CLIP version 1.2.1!
We have an updated interface, new oversampling options, a new downsampling filter technique, and some long-requested new features. Plus, we reset all 30-DAY FREE TRIALS. Check out all the new tech below.
Oversampling Upgrades
GOLD CLIP 1.2.1 allows you to choose between three different oversampling options: High, Pristine and Extra Pristine. You can also choose a different sampling rate for Real Time processing and Offline bouncing.
High - 4x (44.1kHz & 48kHz), 2x (88.2kHz and 96kHz+)
Pristine - 8x (44.1kHz & 48kHz), 4x (88.2kHz and 96kHz+)
Extra Pristine - 16x (44.1kHz & 48kHz), 8x (88.2kHz and 96kHz+)
Oversampling Type - The long-requested Linear-Phase and Minimum-Phase oversampling options are now available in the settings window of Gold Clip. Both oversampling approaches use a newly designed amplitude-modulated downsampling filter and antiderivative anti-aliasing processing.
Interface Updates
The Tooltips have been moved to the front page and a settings page gearbox icon has been added.

The Clip Filter has been moved to the top left of the clipper selection button.

Both AB states now save with your session and you can toggle between A and B without moving the mouse from A to B. Close your eyes, click and make your decision.

AAX - Pro Tools automation quick keys added.

The Settings page has been redesigned.

Gold Clip 1.2.1 is now available in the downloads folder in your Schwabe Digital account.
Also, the 30-day free trial period has been reset. If you tried Gold Clip before and you want to try it again, now is the time.
Tag @SchwabeDigital in an instagram story and show us how you are using the new GOLD CLIP.
We'll repost.
Be well,
Ryan Schwabe
p.s. Subscribe below for updates on Schwabe Digital Plugins.

Reflecting on my Grammy Nomination for Best Engineered Album, Non-Classical
It is coming up on a year since my Grammy nomination for Best Engineered Album, Non-Classical for mixing and mastering Baynk’s Adolescence. When it happened, I was attending the Audio Developers Conference in London on November 12th, 2022.
It is coming up on a year since my Grammy nomination for Best Engineered Album, Non-Classical for mixing and mastering Baynk’s Adolescence. When it happened, I was attending the Audio Developers Conference in London on November 12th, 2022. I was meeting new people in the audio technology and plugin industries and getting excited about finishing Gold Clip. At the keynote address, a New York Times article with my name on it popped up on my phone. I started getting congratulations texts from people I had not heard from in years. I was confused. I had checked the Grammy nominations list an hour prior, and for whatever reason, I did not see my name. I said, "Oh well, maybe next year" and moved on. I kept getting congratulations texts and was generally confused. I thought people were joking with me, but then I looked at that article again and saw my name at the very end — in the Best Engineered category!

I jumped out of my chair, ran out of the keynote address, and screamed my ass off in the lobby. People wondered if I was okay. I was shook, and better than okay. A nomination in this category was something that I had always aspired to but never thought was achievable. Because of the genres of music I worked in and because I made music in a bedroom, not a fancy recording studio, I didn't think it was possible. Best Engineered Album is one of the hardest categories to get nominated in because the submissions span every musical genre except classical. It was the pinnacle of success as a mixing & mastering engineer, and I was humbled.
Ironically, the artist Baynk was living in London at the time and we went out and did a proper celebration together. It was only the second time we met in person. The first was when he was on tour through the US and came through Philadelphia. We made countless songs and records together from other sides of the earth. Baynk in London or New Zealand and I in West Philadelphia.
That experience was one of the most humbling and exciting moments of my life. Awards and accolades are not the reason we get into music, but when they happen, they can reinvigorate your purpose and excitement for your work.
A year later, Gold Clip is out to the world, I continue to mix and master records every day, and I am developing new software tools for next year. I am headed back to the Audio Developers Conference, but this year as a sponsor. Who knows what Grammy nominations await and for who, but my day last year was more than I ever expected.
Thank you for all of the support as a plugin maker and music engineer. I truly appreciate everyone who believes in my ideas and engineering work.
Here is an audio story done by NPR shortly after my nomination.
Tag me on my @SchwabeDigital instagram and let me know what you think..
Be well,
Ryan Schwabe
Grammy-nominated and multi-platinum mixing & mastering engineer
Founder of Schwabe Digital

The Honor of Working in Music
You never know whether a record you are working on is going to be a hit or not. I have tried to predict it and sometimes I was right, but most of the time I had no idea what was going to catch the attention of the world. Honestly, when you start working on a record that turns out to be a hit, it doesn’t feel very different than what you have done before.
You never know whether a record you are working on is going to be a hit or not. I have tried to predict it and sometimes I was right, but most of the time I had no idea what was going to catch the attention of the world. Honestly, when you start working on a record that turns out to be a hit, it doesn’t feel very different than what you have done before.

Sure, you know that there is something special about that song. It hits you in a more brutally honest way than others, but that does not predict where things will go, who will hear it, and how far around the world your work will resonate. That's why it is so important to treat every project you work on like it's a hit.
It's weird, right? Some songs shoot to the top of the charts on the day they are released, others go viral two or even three years later, and some you will spend endless hours on, but they never get released.
You really don't know the power of the art you are creating every day. That's why making music is such a honor and privilege. We get to craft songs and sounds that make people fall in love, that get them hype, or just get them past a trash day.
As producers and engineers, we get to create the sonic palette that surrounds those emotions and it is an honor and privilege. Treat it as such.
Be well,
Ryan Schwabe
Grammy-nominated and multi-platinum mixing & mastering engineer
Founder of Schwabe Digital

01) Introducing GOLD CLIP PACK: More Than a Clipper
GOLD CLIP is much more than just another clipper.
Gold Clip Pack is a family of plugins designed to bring loudness, saturation, and energy to your mixes and masters. It includes both a Mastering Clipper and a Track Clipper, powered by the same advanced internal technology. With unique features like Boxtone, the digital tape-style dynamic processor Alchemy, a parallel mixer, and anti-overshoot oversampling, these tools help you craft mixes and masters with loudness and impact.

GOLD CLIP PACK is much more than just another clipper.
Gold Clip Pack is a family of plugins designed to bring loudness, saturation, and energy to your mixes and masters. It includes both a Mastering Clipper and a Track Clipper, powered by the same advanced internal technology. With unique features like Boxtone, the digital tape-style dynamic processor Alchemy, a parallel mixer, and anti-overshoot oversampling, these tools help you craft mixes and masters with loudness and impact.
It’s a simple tool, but underneath lies complexity. Yes, it’s a clipper, but it’s so much more than that. Once you fully understand Gold Clip, you’ll unlock a wide palette of sounds—from aggressive and dirty to clean and pristine. Over the next few weeks, I’ll send you a few email tutorials and videos to help you unlock the power of Gold Clip.
I promise that if you take a few minutes to read or watch each one, it will vastly improve the results you get from this unique tool.
What does Gold Clip do?
Gold Clip is a clipper, loudness saturator, mid-to-high frequency peak processor, distortion device, box tone generator, clip clock, and true parallel mixer.
It can serve as a mastering processor, a unique dynamic effect for mixing, or a creative tool for production. Gold Clip can be clean and reserved or loud, aggressive, and distorted.
Gold Clip includes two loudness saturation algorithms, both called Gold, as well as a unique mid-to-high frequency peak processor called Alchemy. Both processors are integrated into the clipping algorithm to deliver a maximally smooth and loud master.
The Three Main Functions
The Clipper is inspired by the overloading effects of two famous mastering converters. We named them Modern and Classic. There is also a clean clipper that we cooked up for you called Hard. These three clippers are like no other digital clippers out there. Try pushing your mixes into them and see how smooth and natural they sound. And the clipper isn't even the best part, but it is a necessary step to make Gold processing possible.
Gold processing uses a clever loudness technique that enhances quiet sounds in your mix, without altering the peaks. I like to call it compression without consequence, but in reality, it is compression without attack and release. Use the input trim to boost your mix up to the clipper's ceiling, add some Gold, and experience the power of this incomparable dynamic effect.
Alchemy is a peak processor that operates in the mid to high frequencies, reducing harshness and unwanted clipping effects. As the signal reaches the clip point, Alchemy gently softens the mid to high frequencies. I like to think of it as digital tape because it can take the ugly bite out of a mix when things get loud.
Check out this short Gold Clip video on YouTube.
Let me know what you think. Hit reply or tag @SchwabeDigital in an instagram story and show us how you are using Gold Clip. We'll repost.
In the next blog, I'll show you a simple and effective way to get the most out of Gold Clip Pack.
Be well,
Ryan Schwabe
Grammy-nominated and multi-platinum mixing & mastering engineer
Founder of Schwabe Digital
p.s. If you REALLY want to go deeper, click here to read the full Gold Clip Pack manual.


02) Get Quick Results with Gold Clip Pack
This is a simple, straightforward way to use GOLD CLIP for mixing and mastering in any genre.
In the previous blog, you got a sneak peek into GOLD CLIP and some of its unique features. Today, we're going to cover a simple, straightforward way to use Gold Clip for mixing and mastering in any genre.
The Seven Steps to Loudness
1. Put Gold Clip on the first open insert slot on your master fader. I typically put my final limiter in the last insert slot... what goes in between is up to you.
2. Use Gold Clip's default preset and make sure the I/O Trims are linked by clicking the 🔗 symbol above the waveform display.
3. Navigate to the loudest part of the song and increase the input trim until you see 1 dB or less of clipping. Why not more? While Gold Clip excels at clipping, its true magic lies in Gold processing. Excessive clipping reduces Gold processing's transparency, so we’ll lightly clip the track to let it shine. To fully capture Gold's compression curve, push the signal just below the clip point.
4. Add 1 dB to 2.5 dB of Modern Gold processing and then set your final limiter to a loudness level that you think is appropriate for the production. The more Gold you add, the less final limiting you will need.

5. To smooth things out more, add up to 1 dB of Alchemy processing to taste.

6. Audition the Modern and Classic Box Tones.

7. Toggle the internal bypass and hear the magic of Gold Clip.
That's it!
Using this straightforward setup for mastering or mixing ensures you get the best results from Gold Clip's unique GOLD processing. With Gold Clip Track, the optimized version for track inserts, you can apply that sound to every element of your mix with reduced latency and CPU usage.
You can think of Gold as a compressor without attack and release - it sounds clean, expensive, and adds a powerful dynamic effect to your mixes and masters.
It's like no other plugin out there.
Let me know what you think! Hit reply or tag @SchwabeDigital in an instagram story and show us how you are using Gold Clip. We'll repost.
In the next blog, we'll talk about how gain staging works within Gold Clip.
Be well,
Ryan Schwabe
Grammy-nominated and multi-platinum mixing & mastering engineer
Founder of Schwabe Digital

03) Gain Staging in Gold Clip Pack
Don't be intimidated. While the internal gain staging of GOLD CLIP is complex, the functionality on the interface is very simple. Once you understand it, you'll be ready to use the plugin in any scenario.
Don't be intimidated. While the internal gain staging of GOLD CLIP is complex, the functionality on the interface is very simple. Once you understand it, you'll be ready to use the plugin in any scenario.
There are four elements that affect gain and they flow like this:
Input Trim --> Clipper Ceiling --> Parallel Mixer --> Output Trim
The Input Trim affects the input level, and Output Trim affects the total plugin output after the parallel mixer. They both float over the I/O meters and look like this.

The I/O Trims are linkable by clicking the 🔗 symbol above the waveform display shown below.

Linking the I/O Trims lets you alter the internal gain staging of Gold Clip and maintain perceived loudness. Basically, when you turn the Input Trim up 1dB, the Output Trim automatically goes down 1dB.
Trim Link Offset

Trim Link Offset allows you to change the gain relationship between the linked input and output. Set your input and output levels, click the link button and your IO Trim relationship is maintained.
- Shift-Drag either fader to change the offset.
- Shift-Option-Click a fader, and the offset is reset to 0 dB.
- Or, turn linking off, make an adjustment, and then turn linking back on.
It is as easy as that. Trim Link Offset is also available in Orange Clip.
The Clipper Ceiling control moves the clipper ceiling, and the knee of the Gold and Alchemy processors down from 0.0dBFS to as low as -36dBFS. This control is most useful when processing lower-level signals like individual tracks in a mix.

The Parallel Mixer allows you to blend wet and dry signals like every other plugin. However, what sets Gold Clip apart is the option to unlink dry and wet signals and blend them separately by clicking on the 🔗 symbol.

For instance, you could put the dry signal at full volume and blend in the clipped signal in from the bottom up! Then adjust the Output Trim to maintain perceived loudness.
In a previous video, I talked about how Gold processing relies on the input being as close to the clip point as possible in order to get the most out of it. In that example, we used the linked I/O Trims to get the signal to the clip point, but now let's use the clipper ceiling.
Two Ways to Clip & Process
1. Link the I/O Trims with the 🔗 above the waveform display
2. Push the Input Trim up so you get exactly 0.0dB of clipping.
3. Take note of the Input Trim level required to get there.
4. Reset the Input Trim to 0dB by option-clicking the fader.
5. Pull the Clipper Ceiling down by the same dB value that you used on the input fader.
You’ve just achieved the same internal gain staging in two different ways. Linking the I/O Trim lets you adjust the signal by ±12 dB, while the Clipper Ceiling allows Clipping, Gold, and Alchemy processing on signals as low as -36 dBFS.
When you use both the Clipper Ceiling and linked I/O Trims together, you can process tracks with levels as low as -48 dBFS, all while maintaining perceived volume.
I generally use linked I/O Trims when Gold Clip is inserted on the master fader, and the Clipper Ceiling control when it is inserted on instrument tracks and buses.
Check out this video to hear this in action.
Give it a try and hit reply to let me know what you think. Or, tag @SchwabeDigital in an instagram story and show us how you are using it. We'll repost.
Next time, we'll dig into Gold Processing and unpack how it works.
Be well,
Ryan Schwabe
Grammy-nominated and multi-platinum mixing & mastering engineer
Founder of Schwabe Digital
p.s. Subscribe below for updates on Schwabe Digital Plugins.
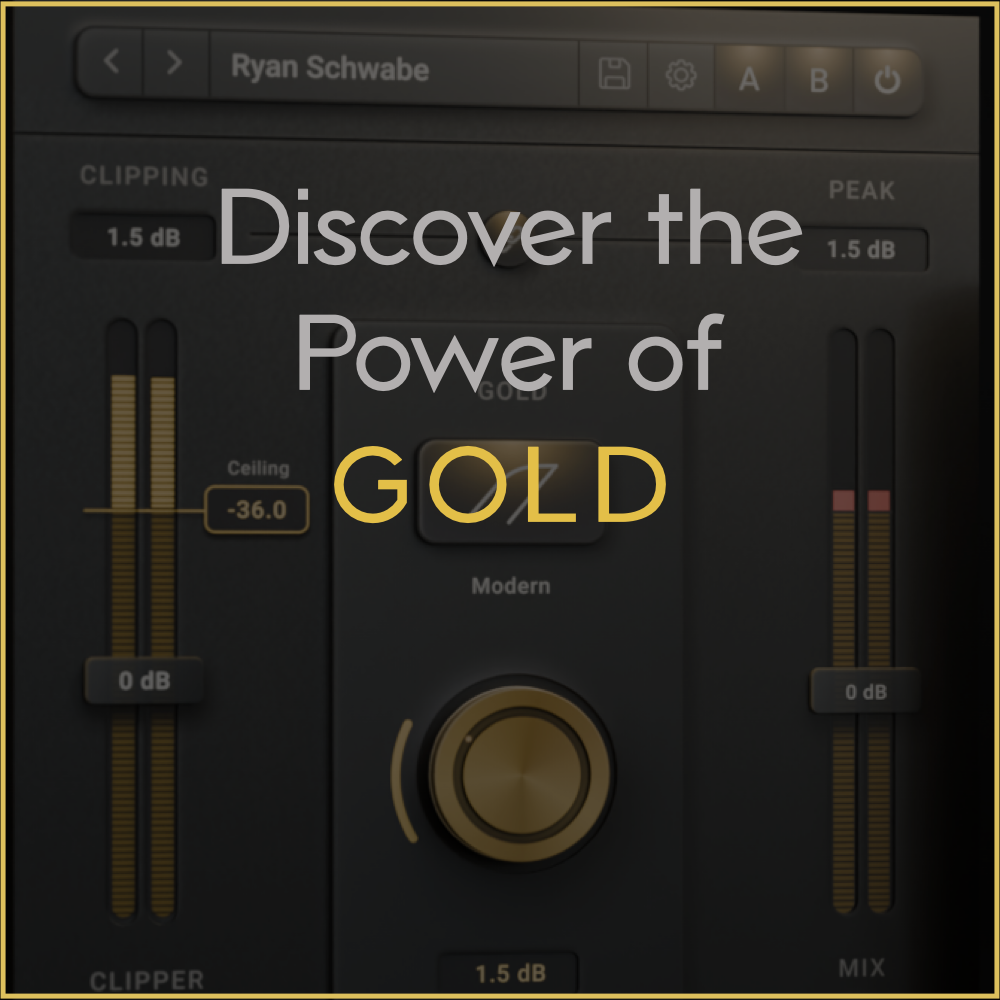
04) Discover the Power of GOLD
The namesake of GOLD CLIP, this feature is fundamentally different than a traditional compressor. Instead of an attack and release time, Gold performs a sample-by-sample analysis of the input and applies a non-linear gain to the signal.
Gold, the namesake feature of GOLD CLIP, redefines compression. Unlike traditional compressors that rely on attack and release times, Gold performs a sample-by-sample analysis of your audio, applying non-linear gain to enhance perceived loudness. Peaks and transients remain untouched, while low-level material and sustain are brought forward, adding depth and presence.
This instantaneous compression works like tape, delivering natural, smooth loudness—without the artifacts caused by attack and release stages. The result? Transients stay fast, clean, and natural, while your mix gains a unique sense of sonic "inflation," making sounds feel bigger and fuller.
When used on your master fader, Gold’s clean approach to loudness can transform how you compress instruments and buses feeding into GOLD CLIP. It’s more than just a tool—it’s a whole new way to shape your sound.
Two Types of GOLD
Modern: Gentle & Transparent Loudness Processing
The Modern setting emulates the soft-knee loudness processing of a renowned mastering converter from 2022, offering a refined, transparent approach to loudness enhancement. Designed for subtlety, Modern provides a gentler and more forgiving form of compression, making it ideal for maintaining clarity and preserving natural dynamics in your mix.
Modern applies less gain than Classic, using a shorter knee to achieve smooth loudness processing. With a maximum of 2.5 dB of gain compared to Classic’s 6 dB, Modern excels at adding just enough loudness without introducing noticeable harmonic coloration. This makes it a perfect choice for clean, polished results, whether on individual tracks or your master bus.
2.5dB of Modern GOLD

Classic: Soft-Knee Saturation with a Punch
Classic emulates the soft-knee loudness processing of a well-loved mastering converter from the late 2000s. While it features a softer knee for amplitude saturation, it delivers a more aggressive sound than Modern and generates greater harmonic excitement at higher settings.
What sets Classic apart is its dynamic knee behavior. The knee’s shape varies based on the amount of Gold applied, starting as low as 12 dB below the clip point when set to 6 dB. This unique design allows for precise control and tonal shaping, making Classic a versatile choice for enhancing loudness with character.
6dB of Classic GOLD

Which to choose?
When mastering, I recommend starting with Modern Gold processing. With its maximum gain of 2.5 dB, it delivers a clean, transparent sound, ideal for dense content like full mixes.
On the master fader, Gold Clip can be placed either first in the chain or just before your final limiter. Placing it first allows you to shape dynamics early, while positioning it just before the limiter ensures maximum loudness and smoothness at the final stage.
For more aggressive processing, Classic Gold is the better option. Its longer knee and higher gain make it perfect for signals with a wider dynamic range, such as drum buses, 808s, effects returns, or vocals.
Choose based on the content and the result you're aiming for—both are powerful tools in the right context.
What is Gold Unity?

Gold Unity is straightforward. If you apply 6 dB of nonlinear gain with Gold, Unity automatically reduces the output by 6 dB of linear gain after Gold. This maintains perceived volume while reducing peaks, allowing you to focus on the compression effects of Gold without being misled by an increase in loudness.

Just remember that the more aggressive clipping you do, the less clean gold processing will sound. When using Gold for loudness, I like to keep my clipping to a minimum.
Here's a quick video example of this entire setup.
Give it a try and hit reply to let me know what you think. Or, tag @SchwabeDigital in an instagram story and show us how you are using it. We'll repost.
In the next post, we'll talk about the companion to Gold, called Alchemy.
Be well,
Ryan Schwabe
Grammy-nominated and multi-platinum mixing & mastering engineer
Founder of Schwabe Digital
p.s. Subscribe below for updates on Schwabe Digital Plugins.
05) Alchemy 2: Smooth, Tape-Inspired Sound
In medieval times, people believed in "alchemy": a fictional process that could supposedly transform mundane materials into precious gold. Sadly, it doesn't exist...
But in GOLD CLIP, it does :)
In medieval times, people believed in "alchemy": a fictional process that could supposedly transform mundane materials into precious gold. Sadly, it doesn't exist...
But in GOLD CLIP, it does :)
🔹 ALCHEMY 2 🔹: Smoother, Richer, More Musical
Alchemy 2 is a peak processor that softens mid-to-high frequencies, reducing harshness and unwanted clipping artifacts. It brings a smooth, tape-like quality to your mix, creating a cohesive and polished sound, especially as signals approach the clip point.
As audio gets louder, Alchemy 2 gently shapes peaks and tames aggressive frequencies without dulling the mix. It’s perfect for maintaining clarity and adding warmth while preserving the natural energy of your tracks.
The below plot shows the EQ curve of Alchemy 2:

When Alchemy is set to 2 dB, the EQ curve above reacts to the clipped signal with the transfer function below.

When To Use ALCHEMY
Much like tape, Alchemy applies high-frequency compression instantaneously, without attack or release artifacts. This makes it ideal for taming harshness in a natural and transparent way.
Alchemy can be used as a subtle de-esser or high-frequency softener. I usually start with Alchemy at 0 dB, then set the amount of clipping I need. From there, I turn up Alchemy to pull back harsh mid-range and high frequencies, creating a smoother, more polished sound.
If you’re using a limiter to add gain after Gold Clip, Alchemy can also enhance perceived loudness. It increases the impact of kick drums and other low-frequency transients as they ascend into the clipper, giving your mix more weight and punch.
Things to Keep In Mind
Alchemy processing is tied to the signal’s proximity to the clip point, similar to Gold processing. In most popular music, the loudest signal is typically the kick drum and/or bass, often around 80 Hz.
As the low-end frequencies from the kick or bass approach the clip point, Alchemy begins reducing the mid and high frequencies. This dynamic adjustment helps maintain balance and smoothness in the mix.
For example, if a clap and a kick hit simultaneously, the clap might appear slightly quieter than the kick. That’s because Alchemy is pulling down the mid-range and highs as the combined signal nears 0.0 dBFS, ensuring a cleaner and more cohesive result.
Check Out this video on the New Alchemy 2!
Give Alchemy 2 a try next time you use Gold Clip, and let me know what you think. Tag @SchwabeDigital in an instagram story and show us how you are using it. We'll repost.
In the next post, we'll talk about the three clipping algorithms.
Be well,
Ryan Schwabe
Grammy-nominated and multi-platinum mixing & mastering engineer
Founder of Schwabe Digital
p.s. Subscribe below for updates on Schwabe Digital Plugins.

06) Three Clippers and a Secret Mode
You probably already have seen that GOLD CLIP has three unique clipper algorithms: Modern, Classic, and Hard.
You probably already know that GOLD CLIP PACK includes three unique clipper algorithms: Modern, Classic, and Hard.
Each has its own distinct sound, and I highly recommend experimenting with all three to find the perfect fit for your music.
But did you know there’s a hidden fourth setting? 🤯 Keep reading, and I’ll reveal the secret behind this powerful feature!
Exploring GOLD CLIP PACK's Clipper Modes
Classic is the default setting and an excellent all-around choice. Inspired by a legendary hardware mastering device, it features a medium knee that works well on nearly any material. It’s my go-to starting point for most mixes.
Modern emulates another iconic hardware device with a softer knee, carefully tuned to match its dynamic response. This mode delivers a more lively sound, particularly accentuating low-frequency transients for a punchy, dynamic feel.
Hard offers the cleanest option, preserving the integrity of the signal below the clip point. For more delicate styles of music, I like to push the input trim so the track sits about half a dB below the clip point. From there, I use Gold for loudness and Alchemy to shape the tone, without introducing any clipping.
Each mode has its own character—experiment to find the perfect fit for your sound!
The Secret Fourth Clean Setting
During development, I insisted on a "clipper off" mode, despite some pushback from my developer.
With the clipper completely disabled, Gold and Alchemy can operate in their cleanest form, free from the harmonic effects of clipping. This setting allows for an ultra-transparent approach, perfect for genres that demand clarity and subtlety.
If you're careful with your gain staging, this mode can work wonders. I’ve used it on modern classical records, folk, ambient, and even some RnB and rap tracks. It’s a step beyond the Hard setting and incredibly powerful when used correctly.
However, be mindful—ensure your signal stays below the clip point. Pushing too hard in this mode can result in unpleasant distortion. With careful use, this hidden gem might become your go-to for pristine audio processing.
How to Unlock the Fourth Clean Setting
Want to access the secret "clipper off" mode? It’s easy: command-click on the Clipper button. This bypasses the clipper and turns the ceiling needle grey, signaling that the clipper is disengaged.
From there, use the linked input/output trim to get your signal as close to 0.0 dBFS as possible. Then, apply Gold and Alchemy processing.
And just like that, you’re using Gold Clip in the cleanest way possible. Perfect for when transparency is your top priority!
Want to Try a Secret-Secret Wild and Aggressive Mode?
Here’s one for the adventurous: turn off the clippers, select Classic GOLD, and crank the input trim into overdrive. What happens next? Some wild, weird, and downright aggressive overloading. This mode takes Gold Clip into uncharted territory—perfect for experimental sounds and pushing boundaries.
Give it a try, and let me know what you think. Tag @SchwabeDigital in an instagram story and show us how you are using Gold Clip. We'll repost.
In the next post, we will talk about what makes the Clip Clock so useful.
Be well,
Ryan Schwabe
Grammy-nominated and multi-platinum mixing & mastering engineer
Founder of Schwabe Digital
p.s. Subscribe below for updates on Schwabe Digital Plugins.

07) Monitor Your Clipping with Clip Clock
Clip Clock is very simple idea, but a powerful tool that is unique to Gold Clip. It does two things.
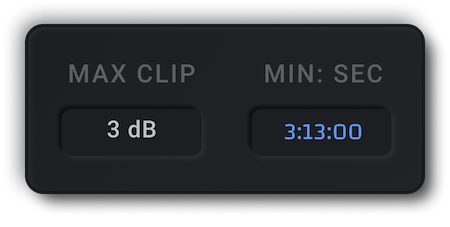
Clip Clock is a unique feature in Gold Clip, designed to give you precise control over your clipping and Gold processing. It offers two essential functions:
Max Clipping Amount
Clip Clock monitors the maximum amount of clipping in your track. If you clip by 5 dB and that’s more than you intended, the MAX CLIP field will clearly display it, allowing you to make adjustments as needed.
Max Clipping Location
Clip Clock records the exact MIN:SEC where the maximum clipping occurred, making it easy to pinpoint the location. Even if the plugin window is closed, Clip Clock continues to monitor your clipping. To evaluate where your clipper is working the hardest, navigate to the MIN:SEC in your song, take a listen, and decide if the clipping is too much or just right.
You can reset MAX CLIP or MIN:SEC anytime by double-clicking on them.
This tool is simple yet invaluable for refining your clipping and Gold processing. Remember: less clipping leads to cleaner Gold processing, as the two are inversely related. That’s why Clip Clock exists—to help you fine-tune your clipping and maximize the impact of Gold.
Hit reply and let me know if you are using Clip Clock. Or tag @SchwabeDigital in an instagram story and we'll repost.
Happy record making~
Ryan Schwabe
Grammy-nominated and platinum mixing & mastering engineer

08) Refining High Frequencies with Box Tone
Box Tone is one of the more subtle processors on GOLD CLIP, but I often find it helpful when I want to smooth out the top end of digital recordings. In effect, Box Tone is a hyper-sonic low-pass filter that cleans up some of the digital ugliness on the very top of a mix.
Box Tone is one of the more subtle processors in GOLD CLIP, but I often find it invaluable for smoothing out the top end of digital recordings. Think of it as a hyper-sonic low-pass filter that helps clean up some of the digital harshness in the very highest frequencies of a mix.
While subtle, Box Tone adds a slight contour to the highs, creating a smoother, more cohesive top end—especially when using the Modern setting.
Here’s a look at what Box Tone is doing:
FLAT: The True Bypass Option
When set to FLAT, Box Tone is completely bypassed. There’s no contour or hyper-sonic low-pass filtering applied—it remains true to the input signal all the way up to 40 kHz in a 96 kHz host sample rate session. This setting ensures a completely neutral pass-through, perfect for when you want an unaltered, transparent output.

CLASSIC: Smooth Air-Band Contour
The CLASSIC setting adds a gentle air-band contour around 20 kHz, slightly softening the top end in your mix. It also applies a hyper-sonic low-pass filter, removing unwanted frequencies beyond our hearing range, between 20 kHz and 40 kHz.
This setting is perfect for subtly shaping the high end while keeping the extreme top end clean and true to input.

MODERN: High-End Shaping
The MODERN setting introduces a more aggressive contour than CLASSIC, with subtle cuts around 3 kHz and 8 kHz to reduce harshness and improve smoothness. It also slightly reduces the air-band around 20 kHz by 0.3 dB, adding a refined touch to the top end.
Like CLASSIC, it features a hyper-sonic low-pass filter to remove unwanted frequencies between 20 kHz and 40 kHz, but with a more assertive tonal shaping that’s ideal for modern productions requiring a tighter, smoother high-frequency response.

Box Tone is a high-precision filter inspired by the mid- and high-frequency contours of modern and classic converters. As you’d expect, converters are designed to be as flat and balanced as possible, so these effects are intentionally subtle.
Box Tone captures this nuanced behavior, providing a gentle and refined way to shape the top end of your mix while preserving its natural character.
Hit reply and let me know how you are using Box Tone in your mixes and masters. Or, tag @SchwabeDigital in an instagram story and show us how you are using Gold Clip. We'll repost.
Be well,
Ryan Schwabe
p.s. Subscribe below for updates on Schwabe Digital Plugins.

09) Unlocking True Parallel Processing
In my mixing I use a lot of parallel processing. Parallel compression, distortion, modulation, and obviously time-based effects. The benefit of using parallel processing is …
In my mixing, I rely heavily on parallel processing—whether it’s compression, distortion, modulation, or time-based effects. The beauty of parallel processing is that it allows you to shape sounds from the bottom up, rather than the top down. Effects like compression, distortion, and modulation no longer clamp down on the peaks of your signal; instead, they hover beneath, supporting and enhancing the sound’s foundation. You might know this technique as "Bottom-Up Compression," "NY Style Compression," or simply "Parallel Compression."
I’ve always loved a mix/blend knob on plugins, and in its default state, GOLD CLIP’s mix/blend works like any other. But it can do so much more.
While developing GOLD CLIP, I asked myself: Why don’t plugins offer a true parallel option for bottom-up processing? That question led to the creation of GOLD CLIP’s True Parallel Mixer—a feature that brings authentic bottom-up parallel processing directly into the plugin.
In addition, GOLD CLIP’s dry signal is a true dry signal—it bypasses oversampling entirely, remaining completely true to the source. This ensures pristine parallel processing with no coloration or alteration of the original signal.
What is a True Parallel Mixer?
A true parallel mixer lets you control the level of the dry signal independently from the wet signal. In Gold Clip, you can unlink the dry and wet signals by clicking the 🔗 symbol between the faders. This unlocks the ability to perform true parallel, bottom-up processing directly within the plugin.
To get started, keep the dry signal at full volume (0.0 dBFS) and blend the wet signal upward from below. This approach allows you to add just the right amount of processing without affecting the peaks of your original signal.

The wet signal contains all of Gold Clip's processing, while the dry signal is the plugin's true input, untouched by oversampling or gain manipulations. The dry signal is simply delayed to ensure it remains time- and phase-aligned with the wet signal.
This setup allows you to mix and blend the dry and wet signals as if Gold Clip were on a send-and-return channel in your DAW, providing full flexibility for true parallel processing.
Potential Uses for the Parallel Mixer
If you want your bass or 808s to decay into a bed of distortion, try this: heavily clip the track, keep the dry fader at full volume, and blend in the wet signal from the bottom up. This keeps the low end clean and pure while letting the bass decay into distortion. There’s even a preset designed for this technique called "Distortion Bed." Check it out!
For a variation with bottom-up compression, use the same preset but back off the clipping and lean into the Gold Processing. This allows sounds to decay into a bed of Gold compression. Or, for a faster setup, try the "Compression in Parallel" preset.
By unlinking the dry and wet faders, you unlock endless possibilities for parallel compression and distortion techniques. Blend effects to your taste, monitor short-term LUFS meters below the input and output meters, and use the output trim to match loudness.
These techniques are incredibly versatile—they work wonders on bass, drums, vocals, effects returns, and more. And the best part? There’s no need to set up aux sends and returns in your DAW. With Gold Clip, you can achieve parallel distortion and compression directly, working from the bottom up to shape your sound.
Hit reply and let me know how you use parallel processing in your work. Or, tag @SchwabeDigitalin an instagram story and show us how you are using it. We'll repost.
Happy record making~
Ryan Schwabe
Grammy-nominated and multi-platinum mixing & mastering engineer